
This blog shows you how to integrate AG Grid, our React Table library, with Next.js:
Check out the GitHub repository for the complete code or explore a live demo of the sample app on StackBlitz.
Content
- Setting Up a Next.js Project with AG Grid
- Your First React Table
- How to Set Up a License Key for Enterprise
- Enabling Basic Features
- Adding an Integrated Chart
- Loading Data on Demand with Server-Side Row Model (SSRM)
Setting up a Next.js project with AG Grid
Create a new Next.js application by running the following command in your terminal:
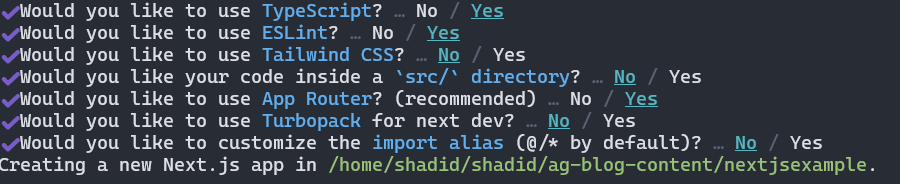
npx create-next-app <your-app-name>When prompted, select the configuration of your preference for your Next.js application:
Next, change the directory to your project folder:
cd <your-app-name>
Finally, install the ag-grid-react library by running the following command:
npm i ag-grid-react --saveRun your application with the npm run dev command and visit http://localhost:3000/ to ensure everything is working as expected.
Your First React Table
To add a React Table to your application, open the app/page.tsx file and replace all the code in this file with the following:
// app/page.tsx
import GridComponent from "../components/GridComponent";

export default function Home() {
  return (
    <div >
      <GridComponent />
    </div>
  );
}
Next, create a new file components/GridComponent.tsx and add the following code:
// components/GridComponent.tsx
"use client";

import { AgGridReact } from 'ag-grid-react';
import { useEffect, useState } from "react";
import type { ColDef } from "ag-grid-community";
import { AllCommunityModule, ModuleRegistry } from "ag-grid-community";

ModuleRegistry.registerModules([AllCommunityModule]);

const GridComponent = () => {
  const [rowData, setRowData] = useState<any[]>([]);

  const [columnDefs, setColumnDefs] = useState<ColDef[]>([
    { field: "athlete" },
    { field: "age" },
    { field: "date" },
    { field: "country" },
    { field: "sport" },
    { field: "gold" },
    { field: "silver" },
    { field: "bronze" },
    { field: "total" },
  ]);

  useEffect(() => {
    fetch("https://www.ag-grid.com/example-assets/olympic-winners.json") // Fetch data from server
      .then((result) => result.json()) // Convert to JSON
      .then((rowData) => setRowData(rowData)); // Update state of `rowData`
  }, []);

  return (
    <div style={{ width: "100%", height: "100vh" }}>
      <AgGridReact rowData={rowData} columnDefs={columnDefs} />
    </div>
  );
};

export default GridComponent;
You can explore the complete code for this section in the following sandbox environment:
Let’s break down the code in the GridComponent.tsx file...
Client Side Rendering
We created a client-rendered component because the ag-grid-react library depends on some browser-specific APIs (e.g., window / document) and can not be rendered server-side. The use client keyword at the top of the file tells Next.js that this component will be rendered on the client side (browser) and not server-side.
AG Grid Modules
AG Grid Modules allow you to reduce your application bundle size by cherry-picking grid features.
When you register a module with the ModuleRegistry it becomes available globally to all instances of AG Grid in your application. For example, to access the CSV Export feature in AG Grid, you need to import & register the CsvExportModule:
import { ClientSideRowModelModule, CsvExportModule, ModuleRegistry } from 'ag-grid-community';

// Register specific modules
ModuleRegistry.registerModules([ClientSideRowModelModule, CsvExportModule]);
There is a handy module selector that can help you pick up the relevant modules for your application.
If bundle size is not a concern, you can register AllCommunityModule to access all the Community features available within AG Grid, which we're using for this example.
Rows and Column Definitions
Column Definitions define the structure and configuration of the columns in the AG Grid table. They specify how data is displayed, formatted, and interacted with for each column in the grid.
The columnDefs state variable in the code is an array of objects, where each object represents the configuration for a single column.
const [columnDefs, setColumnDefs] = useState<ColDef[]>([
  { field: 'athlete' },
  { field: 'age' },
  { field: 'date' },
  { field: 'country' },
  { field: 'sport' },
  { field: 'gold' },
  { field: 'silver' },
  { field: 'bronze' },
  { field: 'total' },
]);
Rows represent the individual records displayed in the React Table. These rows are populated using the data stored in the rowData state variable, which is fetched from an external source:
const [rowData, setRowData] = useState<any[]>([]);

useEffect(() => {
  fetch("https://www.ag-grid.com/example-assets/olympic-winners.json")
    .then(result => result.json()) // Convert to JSON
    .then(rowData => setRowData(rowData)); // Update state of `rowData`
}, []);
Finally, we render the AG Grid component with the rowData and columnDefs props:
return (
  <div style={{ width: '100%', height: '100vh' }}>
    <AgGridReact rowData={rowData} columnDefs={columnDefs} />
  </div>
);
Note that we are setting a height property on the container. AgGridReact component needs a container with explicit dimensions to properly render its layout. If the height of the container is not defined, the grid may not render correctly.
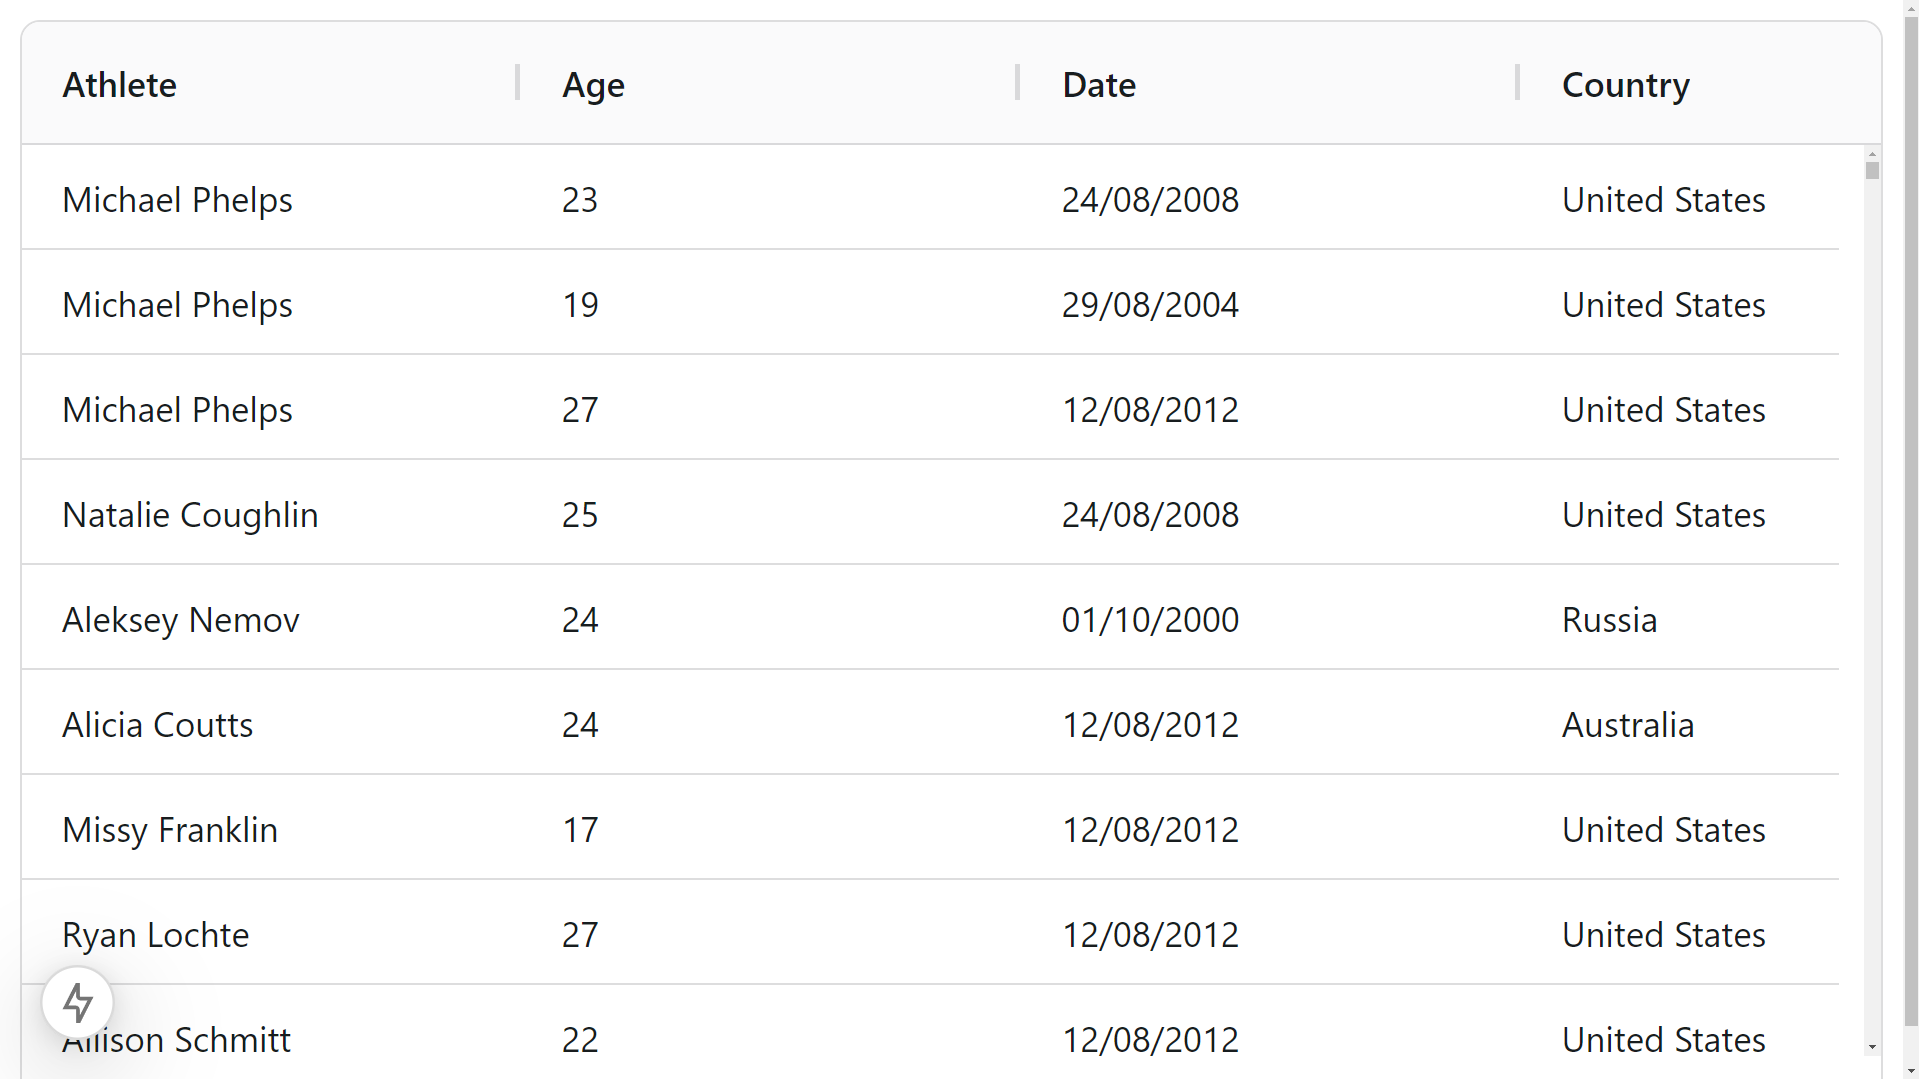
Open your application on http://localhost:3000/ and make sure that the table is working as expected - you should see something like this:
Enabling Basic Features
AG Grid's React Table library offers a wide array of features to facilitate the display and manipulation of tabular data. Some key features of AG Grid include sorting, filtering, pagination, row selection, and cell editing.
These features can be enabled on specific columns by adding the relevant property in the column object in the column definitions array or you can use defaultColDef property to apply these configurations to all columns.
The defaultColDef property allows you to specify default configurations for all columns in your grid. For instance, if you want all the columns to be resizable unless specified otherwise, you can do so by setting sortable: true in the defaultColDef property.
In the following code block, all columns except the date column are resizable:
const [columnDefs, setColumnDefs] = useState<ColDef[]>([
  { field: 'athlete' },
  { field: 'age' },
  { field: 'date', resizable: false }, // Don't allow resizing
  { field: 'country' },
  { field: 'sport' },
  { field: 'gold' },
  { field: 'silver' },
  { field: 'bronze' },
  { field: 'total' },
]);

const [defaultColDef, setDefaultColDef] = useState({
  resizable: true,
});

return (
  <div style={{ width: '100%', height: '100vh' }}>
    <AgGridReact
      rowData={rowData}
      columnDefs={columnDefs}
      defaultColDef={defaultColDef}
    />
  </div>
);Filtering
Column filters are enabled via the filter attribute. You can specify a filter data type, or set filter to true and the type will be inferred based on cell data. You can also create floating filters by setting the floatingFilter attribute. The floating filter displays the column filter directly in the header for quick access:
const [columnDefs, setColumnDefs] = useState<ColDef[]>([
  { field: 'athlete', filter: 'agTextColumnFilter' },
  { field: 'age', filter: true },
  { field: 'date', resizable: false, filter: 'agDateColumnFilter' },
  { field: 'country' },
  { field: 'sport' },
  { field: 'gold' },
  { field: 'silver' },
  { field: 'bronze' },
  { field: 'total' },
]);
In the previous code block we applied the text filter to the athlete column and the date filter to date column. We also set filter: true for the age column and AG Grid automatically infers a number filter.
You can also set any of these filters in the defaultColDef to apply them to all columns.
Editing
To enable Cell Editing for a Column use the editable property on the Column Definition.
const [columnDefs, setColumnDefs] = useState<ColDef[]>([
  {
    field: 'athlete',
    filter: 'agTextColumnFilter',
    editable: true,
    onCellValueChanged: (event) => {
      console.log(event.data);
      // Handle the cell value change event
      // Here, you can update the data in the server or perform any other action
    }
  },
  // ... rest of the column objects
]);
The onCellValueChanged function runs after the cell value is updated. You can use this function to make API calls to update the data in the server or perform other actions as needed.
Sorting
Sorting is enabled by default. You can click on the column names to sort by ascending or descending order. You can also sort by multiple columns. Hold shift and select the columns that you want to sort by.
If you want to disable sorting for a particular column you can specify it in the column definition. For instance, if I want to disable sorting in the country column I can do so by setting sortable: false.
const [columnDefs, setColumnDefs] = useState<ColDef[]>([
  // ... Rest of the columns
  { field: 'country', sortable: false },
]);Row Selection
You can select rows by passing the rowSelection props in the AgGridReact component.
const rowSelection = useMemo(() => {
  return {
    mode: 'singleRow',
  };
}, []);

return (
  <div style={{ width: '100%', height: '100vh' }}>
    <AgGridReact
      rowData={rowData}
      columnDefs={columnDefs}
      defaultColDef={defaultColDef}
      rowSelection={rowSelection as RowSelectionOptions}
    />
  </div>
);
In the mode you can select singleRow option to enable only one row selection at a time or select multiRow option for selecting multiple row. Learn more about row selection here.
Pagination
You can add pagination by setting the pagination options.
const pagination = useMemo(() => {
  return {
    pagination: true,
    paginationPageSize: 10,
    paginationPageSizeSelector: [10, 20, 30, 40, 50],
  };
}, []);

return (
  <div style={{ width: '100%', height: '100vh' }}>
    <AgGridReact
      rowData={rowData}
      columnDefs={columnDefs}
      defaultColDef={defaultColDef}
      rowSelection={rowSelection as RowSelectionOptions}
      pagination={pagination}
    />
  </div>
);How to Register the AG Grid Enterprise License Key
To access the Enterprise features of AG Grid in production, you need to register your license key.
Given that AG Grid runs on the browser, the license key has to be exposed on the client side of the Next.js application. First, create a new variable in your .env file for the license key:
# .env
NEXT_PUBLIC_AG_GRID_LICENSE="your_license_key"
In Next.js all environment variables by default are accessible only within the Node.js environment. Prefixing the name of an environment variable with NEXT_PUBLIC_ makes it available on the client side.
Next, install the ag-grid-enterprise library:
npm i ag-grid-enterprise --saveFinally, add the following code to your GridComponent.tsx file to import the LicenseManager and set your license key:
import 'ag-grid-enterprise'; // Import the Enterprise features
import { LicenseManager } from "ag-grid-enterprise";

// Register License Key with LicenseManager
LicenseManager.setLicenseKey(process.env.NEXT_PUBLIC_AG_GRID_LICENSE || '');
To ensure your key is properly set up, check that your app does not display a watermark or a console warning in the browser.
You can choose to trial any enterprise features at any time by installing the ag-grid-enterprise and ag-charts-enterprise packages. The only restrictions are:
- You will get a watermark in your charts and react tables when using the free version
- You will get errors in your browser console stating that a license key is needed to use this feature
To avoid this, you can request a trial license key by emailing us at info@ag-grid.com
Integrated charts
Next, let's add an Integrated Chart to our React Table to allow users to visualize data directly within the grid interface
Integrated Charts is an enterprise feature of AG Grid, meaning you need to install the ag-grid-enterprise package to access it. There are also two versions of Integrated Charts: Community & Enterprise. Purchasing a license key for AG Grid provides access to Community Integrated Charts. To access all of the Enterprise Features of AG Charts, you'll also need an AG Charts Enterprise licence.
For this example, we'll focus on AG Charts Enterprise. To install it, run the following command:
npm i ag-charts-enterprise --saveNext, import the IntegratedChartsModule and AgChartsEnterpriseModule.
import { AgGridReact } from 'ag-grid-react';
import { IntegratedChartsModule, ContextMenuModule } from 'ag-grid-enterprise';
import { AgChartsEnterpriseModule } from 'ag-charts-enterprise';

ModuleRegistry.registerModules([
  AllCommunityModule,
  ContextMenuModule,
  IntegratedChartsModule.with(AgChartsEnterpriseModule),
]);
By calling IntegratedChartsModule.with(AgChartsEnterpriseModule) inside your module registry, you are telling AG Grid to enable charting features in your data table.
The ContextMenuModule is also required to enable the right-click context menu, which we'll use to build the charts within the grid.
Finally, add the enableCharts and rowSelection props to your AgGridReact component:
const rowSelection = useMemo(() => {
    return {
      mode: 'multiRow',
    };
  }, []);

<div style={{ width: '100%', height: '100vh' }}>
  <AgGridReact
    rowData={rowData}
    columnDefs={columnDefs}
    defaultColDef={defaultColDef}
    enableCharts // Enable the Charting features
    cellSelection
    rowSelection={rowSelection as RowSelectionOptions}
  />
</div>
You can select multiple rows at once by dragging your mouse or holding ctrl. Once you select multiple rows, right-click and you will get a chart option to create a chart from the selected data.
The following is the complete code example for creating an Integrated Chart:
Loading Data on Demand with Server-Side Row Model
AG Grid's Server-Side Row Model (SSRM) is designed to efficiently handle large datasets by loading data on-demand from the server rather than fetching the data all at once in the browser. This approach reduces the browser's memory footprint and improves performance.
The key features of SSRM are:
- Lazy-Loading of Groups: Initially, only top-level rows are loaded. Child rows within groups are fetched from the server when the user expands the respective group.
- Infinite Scrolling: Data is retrieved in blocks; as the user scrolls through more data is loaded from the server side in chunks.
- Server-Side Operations: Operations such as sorting, filtering, grouping, and aggregation are executed on the server for larger datasets.
Implement Server-Side Sorting
Let's demonstrate this by implementing Server-Side Sorting using SSRM.
First, in your GridComponent import and register the ServerSideRowModelModule:
import {
  ContextMenuModule,
  IntegratedChartsModule,
  ServerSideRowModelModule, // import SSRM module
} from 'ag-grid-enterprise';

ModuleRegistry.registerModules([
  AllCommunityModule,
  ContextMenuModule,
  ServerSideRowModelModule, // register SSRM
  IntegratedChartsModule.with(AgChartsEnterpriseModule),
]);
The actual sorting of rows is performed on the server when using the Server-Side Row Model. One main component of this model is the Server-Side Datasource, which acts as a bridge between the grid and your server, facilitating data retrieval based on user interactions.
Write a new function, getServerSideDatasource, that creates a Server-Side Data source. AG Grid will use this function to fetch data on demand:
const getServerSideDatasource = (): IServerSideDatasource => {
  return {
    async getRows(params: IServerSideGetRowsParams) {
      console.log('[Datasource] - rows requested by grid: ', params.request);
      try {
        const response = await fetch('/api/mock-server', {
          method: 'POST',
          headers: { 'Content-Type': 'application/json' },
          body: JSON.stringify(params.request as IServerSideGetRowsRequest),
        });

        if (!response.ok) {
          console.error('Failed to fetch data from server');
          params.fail();
          return;
        }

        const data = await response.json();
        console.log('[Datasource] - rows returned from server: ', data);

        if (data.success) {
          params.success({
            rowData: data.rows,
            rowCount: data.lastRow,
          });
        } else {
          params.fail();
        }
      } catch (error) {
        console.error('Error fetching data: ', error);
        params.fail();
      }
    },
  };
};
Let's break down the code above...
The function returns an object containing the getRows method, which AG Grid invokes when it requires data:
return {
  async getRows(params: IServerSideGetRowsParams) {
    // ...
  },
};
The params object provides details about the request, including sorting, filtering, and the range of rows needed.
Inside the getRows function it sends a POST request to the server endpoint /api/mock-server.
const response = await fetch('/api/mock-server', {
  method: 'POST',
  headers: { 'Content-Type': 'application/json' },
  body: JSON.stringify(params.request as IServerSideGetRowsRequest),
});
If the server indicates success, it calls params.success() with the retrieved rows and the total row count. Otherwise, it calls params.fail():
if (data.success) {
  params.success({
    rowData: data.rows,
    rowCount: data.lastRow,
  });
} else {
  params.fail();
}
The params.success() call delivers the retrieved data back to the grid.
In your AgGridReact component add the rowModelType={'serverSide'} option to enable the Server-Side Row Model:
<AgGridReact
  columnDefs={columnDefs}
  defaultColDef={defaultColDef}
  enableCharts={true} // Enable the Charting features
  cellSelection={true}
  rowSelection={{
    mode: 'multiRow',
  }}
  rowModelType={'serverSide'} // enables SSRM
  onGridReady={onGridReady} //
/>
In the AgGridReact component there is an onGridReady prop, which accepts a callback function that executes when the grid has completed initializing:
const onGridReady = useCallback((params: GridReadyEvent) => {
  console.log('Grid ready event received');
  const datasource = getServerSideDatasource();
  // Register the datasource with the grid
  params.api!.setGridOption('serverSideDatasource', datasource as any);
}, []);
Inside the callback function, we call the getServerSideDatasource function to get the data from the server and then the grid consumes the returned data.
For this to work we need an API endpoint that takes care of the sorting logic on the server. We can implement a mock endpoint using a Next.js app router API route.
Create a new file app/api/mock-server/route.ts and add the following code:
// app/api/mock-server/route.ts
import { NextRequest, NextResponse } from 'next/server';

interface SortModel {
  colId: string;
  sort: 'asc' | 'desc';
}

interface IServerSideGetRowsRequest {
  startRow: number;
  endRow: number;
  sortModel?: SortModel[];
}

export async function POST(request: NextRequest) {
  const reqBody = (await request.json()) as IServerSideGetRowsRequest;

  // Fetch data from the external API
  const dataResponse = await fetch(
    'https://www.ag-grid.com/example-assets/olympic-winners.json'
  );
  const olympicData = (await dataResponse.json()) as any[];

  let rows = [...olympicData];

  // Sorting logic
  if (reqBody.sortModel && reqBody.sortModel.length > 0) {
    rows.sort((a, b) => {
      for (const sortDef of reqBody.sortModel!) {
        const { colId, sort } = sortDef;
        const aValue = a[colId];
        const bValue = b[colId];

        if (aValue < bValue) return sort === 'asc' ? -1 : 1;
        if (aValue > bValue) return sort === 'asc' ? 1 : -1;
      }
      return 0;
    });
  }

  const { startRow = 0, endRow = rows.length } = reqBody;
  const requestedRows = rows.slice(startRow, endRow);
  const lastRow = rows.length;

  return NextResponse.json({
    success: true,
    rows: requestedRows,
    lastRow: lastRow,
  });
}
The provided code defines a POST API route in a Next.js application that serves as a mock server for AG Grid's Server-Side Row Model. It processes data requests from the grid, applies server-side sorting based on the grid's specifications, and returns the appropriate subset of data.
If the request includes a sortModel, the function sorts the data accordingly. It iterates through the sorting instructions, comparing values of the specified columns and ordering the rows based on the specified sort direction (asc for ascending or desc for descending).
if (reqBody.sortModel && reqBody.sortModel.length > 0) {
  rows.sort((a, b) => {
    for (const sortDef of reqBody.sortModel!) {
      const { colId, sort } = sortDef;
      const aValue = a[colId];
      const bValue = b[colId];

      if (aValue < bValue) return sort === 'asc' ? -1 : 1;
      if (aValue > bValue) return sort === 'asc' ? 1 : -1;
    }
    return 0;
  });
}
You can find the complete code example for this section in the following sandbox environment:
You can find a more in-depth explanation of the Server Side Row Model (SSRM) in our docs.
Where to go from here
In this article, you learned how to implement AG Grid in Next.js. To learn more about AG Grid visit our Documentation.
You can also find plenty of real-world examples, open-source projects and code samples on our Community Page.