
- What is Infinite Scrolling?
- Building an Angular State Management App
- Initializing application and installing dependencies
- Home view
- Styling the home component
- Header component
- App component
- Introducing NgRx/store
- Registering the reducer
- Fetching products from the server
- Products list view
- Implementing infinite scroll
- Conclusion
What is Infinite Scrolling?
Infinite scrolling is a UX pattern that allows a customer to load content continuously as the customer scrolls down the page, ensuring the customer always has new content to consume. Infinite loading is implemented using scroll listeners that monitor the user’s position on the page, triggering events when the user reaches the scroll threshold.
Building an Angular State Management App
Today, we’ll be building an online store application using Angular; we’ll manage to load the products and update the cart using ngrx/store; a state management library. When applications grow to be complicated, managing data in the application becomes a tad confusing, this is where the importance of a state management library like ngrx/store arises.
An essential advantage of state management libraries in large scale applications especially hierarchical ones is the ability to abstract the state of the application from components into an application wide state. This way, data can be passed around with ease and components can act independently with each other.
In this tutorial, we’ll be building a product store using Angular, in our store, a user can add and remove products from the cart. We’ll also look at how we can use Effects for handling network requests, reducers and actions for data management.
To follow this tutorial a basic understanding of Angular and Node.js is required. Please ensure that you have Node and npm installed before you begin.
We’ll be using these tools to build our application:
- Angular
- NgRx/store
- NgRx/effects
- mockapi - we’ll use this free service to generate a mock API that’ll serve products to our application
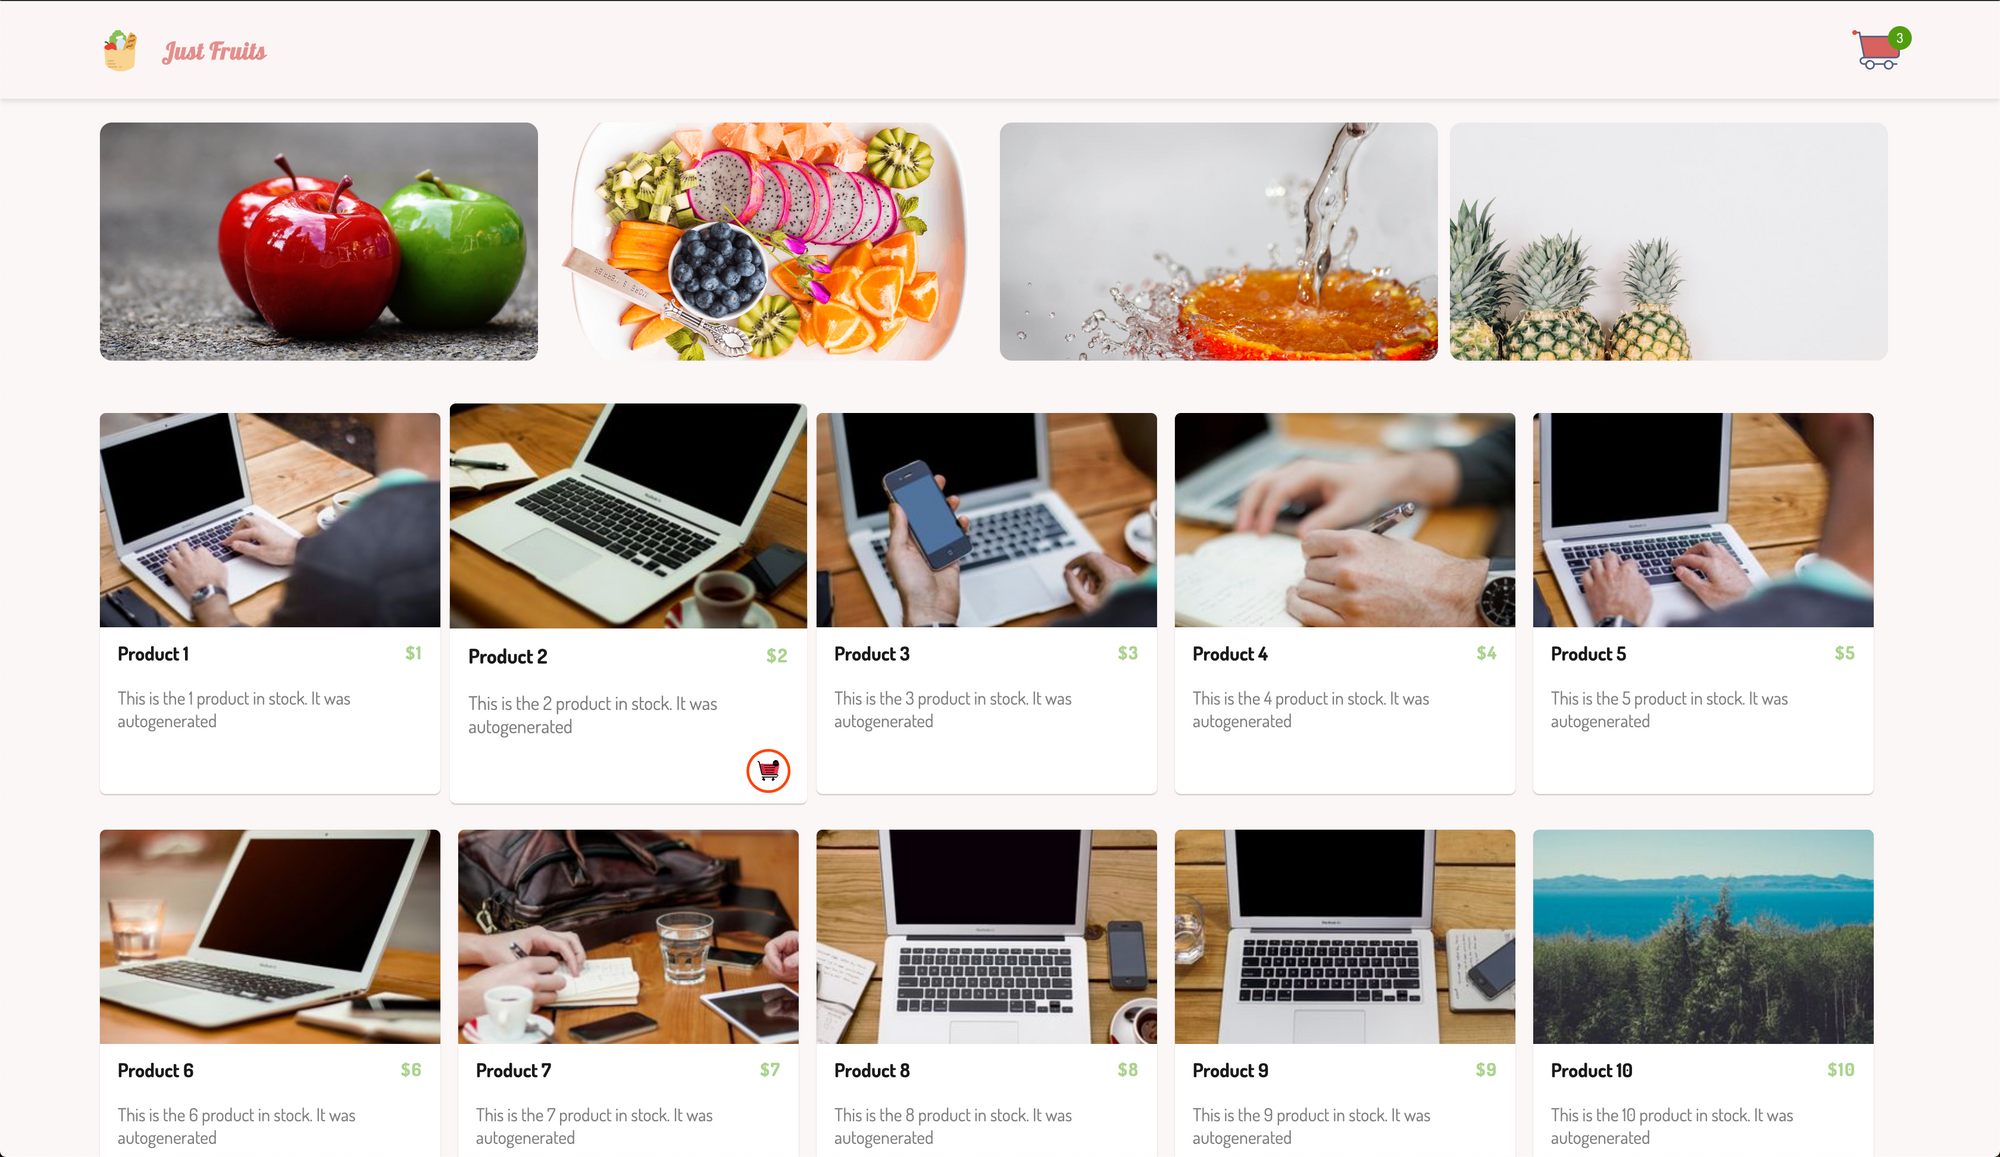
Here’s a screenshot of the final product:

Initializing application and installing dependencies
To get started, we use the CLI (command line interface) provided by the Angular team to initialise our project.
First, install the CLI by running npm install -g @angular/cli. NPM is a package manager used for installing packages. It is available on your PC if you have Node installed, if not, download Node here.
To create a new Angular project using the CLI, open a terminal and run:
`ng new angular-shop --style=scss`
This command is used to initialise a new Angular project; the project will use SCSS as the pre-processor.
Next, run the following command in the root folder of the project to install dependencies.
// front-end dependencies
    npm install @ngrx/store @ngrx/effects ngx-infinite-scroll@^7.0.0
Start the Angular development server by running `ng serve` in a terminal in the root folder of your project.
Home view
To get started, we’ll define the views for the application, starting from the home page. The home page houses the products grid and the header. Using the CLI, we’ll create a component named `home` within the `src/app` folder. Run the command below in the project folder to create the `home` component:
ng generate component homeOpen the `home.component.html` file and replace it with the content below.
<!-- /src/app/home/home.component.html -->
<main>
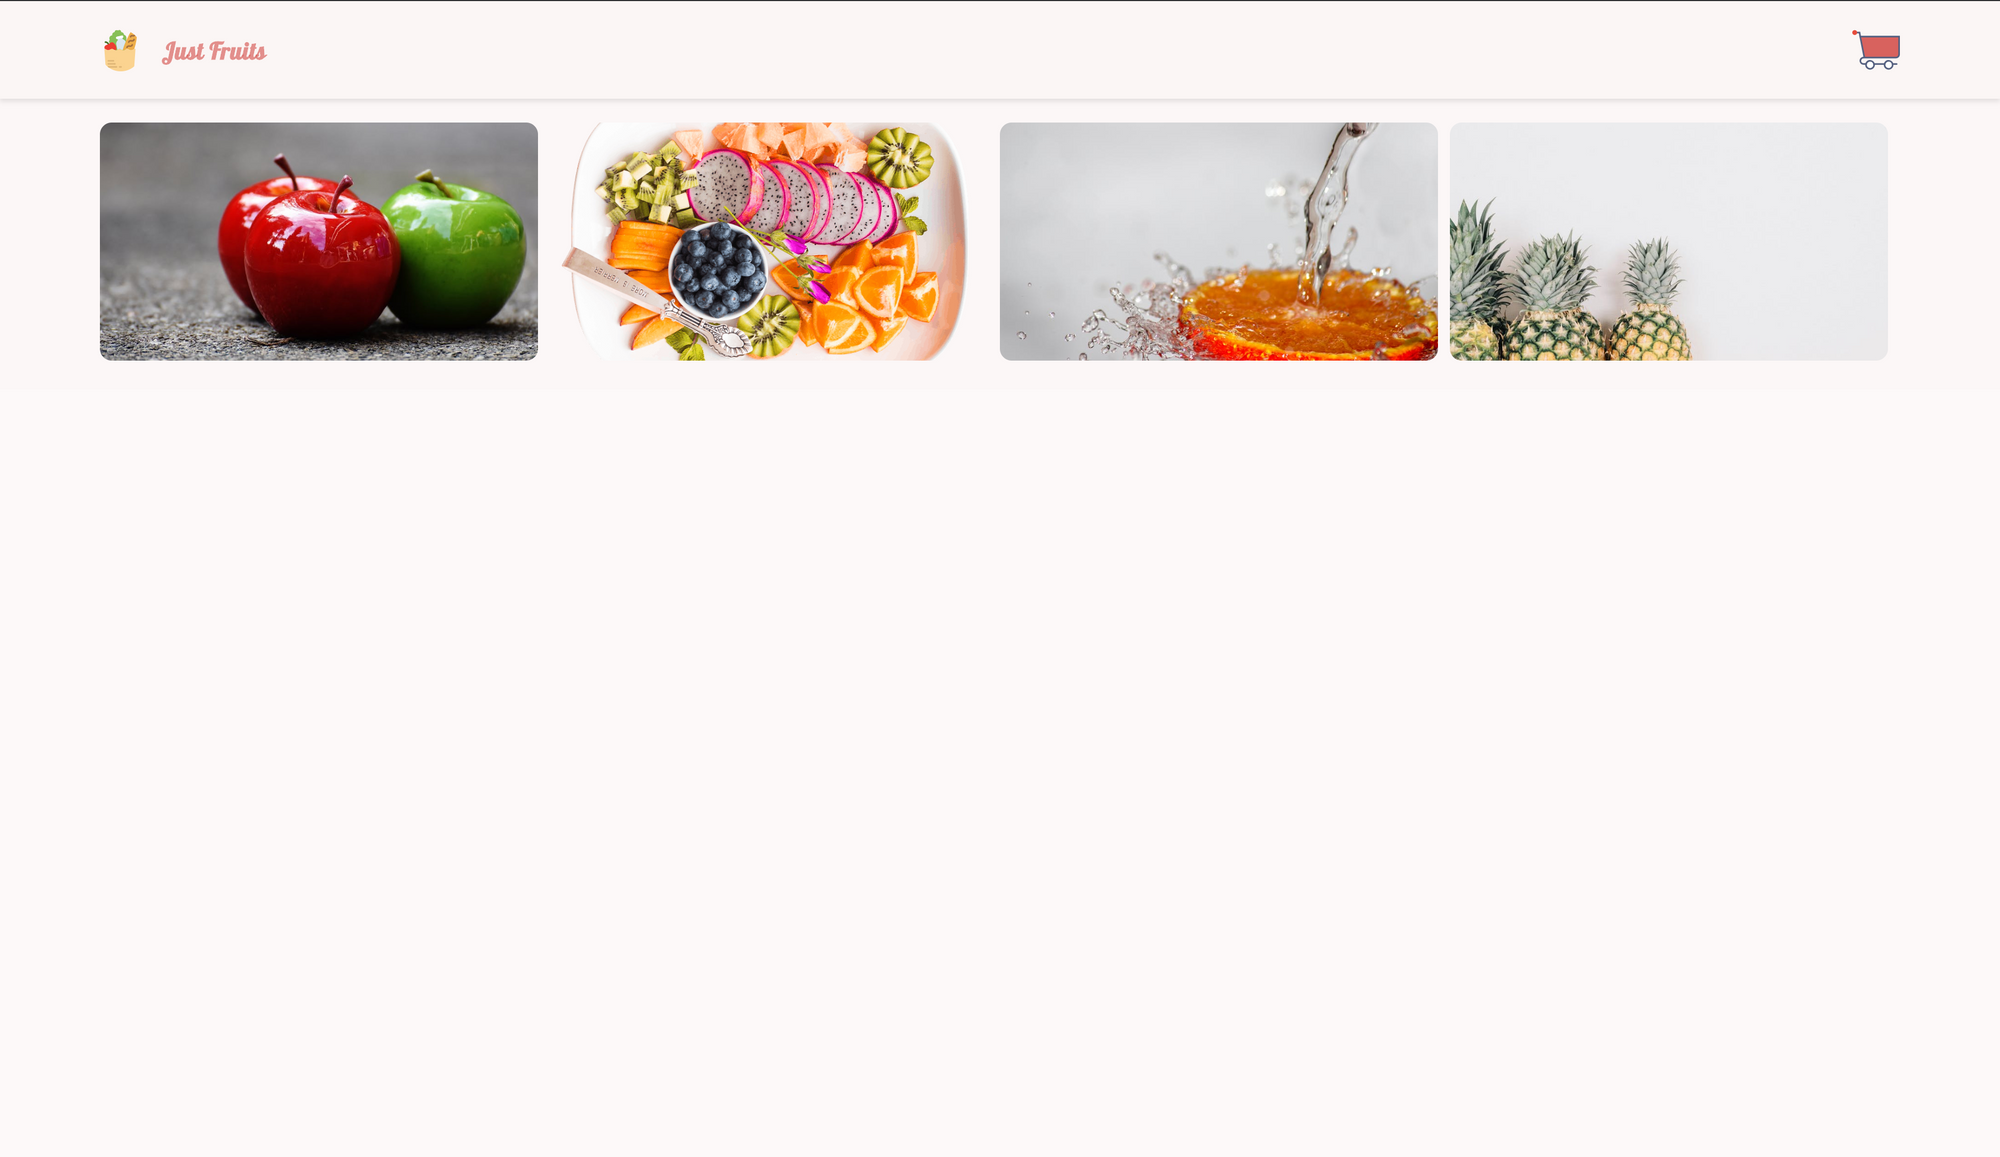
<section class="banners">
<div *ngFor="let banner of banners">
<img [src]="banner.src" [alt]="banner.alt" />
</div>
</section>
<section class="product-area">
<!-- TODO: Create product list component -->
</section>
</main>- You can find image assets used here.
In the snippet above, we’ve defined an area for the banners and products list. The banner area houses four banner images. We’ll go about creating the product list component later in the tutorial.
Styling the home component
Next, we’ll go about styling the home page, the banner area to be exact. We’ll give the images a defined height and give the container a max width.
// src/app/home/home.component.scss
    main{
      width: 90%;
      margin: auto;
      padding: 20px 15px;
      .banners{
        display: flex;
        align-items: center;
        justify-content: center;
        div{
          width: 26%;
          margin-right: 10px;
          img{
            height: 200px;
            width: 100%;
            max-width: 100%;
            border-radius: 10px;
            object-fit: cover;
            &:hover{
              transform: translateY(-10px);
              transition: 0.2s ease-in-out;
            }
          }
        }
      }
    }
In the view template, we looped through an array of `banners`, we’ll update the component file to declare variables used in the view template. Open the `home.component.ts` file and update it to be similar to the snippet below:
import { Component, OnInit } from '@angular/core';

    @Component({
      selector: 'app-home',
      templateUrl: './home.component.html',
      styleUrls: ['./home.component.scss']
    })
    export class HomeComponent implements OnInit {
      constructor() {
      }

      items = [];
      banners = [
        {
          src:
            "https://images.pexels.com/photos/209339/pexels-photo-209339.jpeg?auto=compress&cs=tinysrgb&dpr=2&h=300&w=510",
          alt: "A tasty treat"
        },
        {
          src:
            "https://images.pexels.com/photos/247685/pexels-photo-247685.png?auto=compress&cs=tinysrgb&dpr=2&h=300&w=510",
          alt: "Chocolate covered pancakes"
        },
        {
          src:
            "https://images.pexels.com/photos/68899/pexels-photo-68899.jpeg?auto=compress&cs=tinysrgb&dpr=2&h=300&w=510",
          alt: "Burger and fries"
        },
        {
          src:
            "https://images.pexels.com/photos/165776/pexels-photo-165776.jpeg?auto=compress&cs=tinysrgb&dpr=2&h=300&w=510",
          alt: "Get ready to slice"
        }
      ]
      ngOnInit() {
      }
    }
Since we’ll be using external fonts, we’ll update the `src/index.html` file with a `link` tag alongside the `src/styles.scss.` file.
<!-- index.html -->

    <!doctype html>
    <html lang="en">
    <head>
      <meta charset="utf-8">
      <title>MyStore</title>
      <base href="/">

      <meta name="viewport" content="width=device-width, initial-scale=1">
      <link href="https://fonts.googleapis.com/css?family=Dosis:400,500,700|Lobster" rel="stylesheet">
      <link rel="icon" type="image/x-icon" href="favicon.ico">
    </head>
    <body>
      <app-root></app-root>
    </body>
    </html>
Then we’ll select Dosis as our default font family; we’ll also negate the default `padding` and `margin` on the `body` and `html` elements. Open the `styles.scss` file and update it with the following content:
body, html{
  margin: 0;
  padding: 0;
  font-family: 'Dosis', sans-serif;
  background-color: whitesmoke;
}
Header component
The header component displays the application logo and very little information. This component is mostly a display component.
Run the following command to create the header component:
ng generate component headerNext, open the `src/app/header/header.component.html` file and update it to look like the code below:
<!-- src/app/header/header.component.html -->
    <header>
        <div class="brand">
          <img src="/assets/images/logo.svg" alt="avatar">
          <h5>Just products</h5>
        </div>
        <div class="nav">
          <ul>
            <li>
              <img src="/assets/images/cart.svg" alt="cart">
              <span class="badge" *ngIf="cart.length > 0">{{ cart.length }}</span>
            </li>
          </ul>
        </div>
    </header>
Note: Image asset used can be found here in the GitHub repository. The logo is from https://flaticon.com.
Next, we’ll style the header. Open the `header.component.scss` file and update it with the snippet below:
header {
      display: flex;
      background-color: white;
      margin: 0;
      padding: 5px 5%;
      color: whitesmoke;
      box-shadow: 0 2px 4px 0 rgba(0, 0, 0, 0.1);
      background: #fbf3f259;
      .brand {
        flex: 1;
        display: flex;
        align-items: center;
        img {
          height: 35px;
          border-radius: 50%;
          margin-right: 17px;
        }
        h5 {
          font-family: 'Lobster', cursive;
          font-size: 20px;
          margin: 0;
          letter-spacing: 0.4px;
          color: #d8625e;
          opacity: 0.7;
          text-transform: capitalize;
        }
      }
      ul {
        list-style: none;
        padding-left: 0;
        display: flex;
        li {
          display: flex;
          align-items: center;
          position: relative;
          img {
            width: 40px;
          }
          .badge {
            height: 20px;
            width: 20px;
            font-size: 11px;
            color: white;
            background-color: rgb(83, 158, 17);
            display: flex;
            justify-content: center;
            align-items: center;
            position: absolute;
            top: 0;
            right: -10px;
            border-radius: 50%;
          }
        }
      }
    }
Just a couple of styles to beautify the header. Next, we’ll render the `header` and `home` components in the `app.component.html` file.
App component
After creating the `home` and `header` components, the next step is to render the components in the root `App` component. Open the `app.component.html` file within the `src/app/` directory. Update it to render both `Header` and `Home` components.
<!-- app.component.html -->
    <div>
      <app-header></app-header>
      <app-home></app-home>
    </div>
Start the application server by running the following command: `npm start` or `ng serve`.
Then navigate to http://localhost:4200 on your browser, you should see the something similar to the screenshot below:
Introducing NgRx/store
NgRx/store is a library for managing state in your Angular applications; it is a reactive state management library powered by RxJS. Similar to Redux, this library can be used to manage the flow of data throughout your application, after dispatching actions, reducers act on them and mutate the store. Another library we’ll be working with is [NgRx/effects], effects are commonly used to handle side effects in your application, like fetching data from an external resource.
The first step is to create and assign actions. The actions are mapped to constants using an `enum`. Create a folder named `store` within the `src/app` directory; this folder holds everything relating to our application’s state management.
Within the `store` folder, create a file called `actions.ts`. Open the file and update it with the code below:
// src/app/store/actions.ts
    import { Action } from '@ngrx/store';
    interface Product {
      name: string;
      price: number;
      description: string;
      image: string;
    }

    export enum ActionTypes {
      Add = '[Product] Add to cart',
      Remove = '[Product] Remove from cart',
      LoadItems = '[Products] Load items from server',
      LoadSuccess = '[Products] Load success',
    }

    export class AddToCart implements Action {
      readonly type = ActionTypes.Add;
      constructor(public payload: Product) {}
    }

    export class GetItems implements Action {
      readonly type = ActionTypes.LoadItems;
      constructor(public payload: { page: number; limit: number }) {}
    }

    export class RemoveFromCart implements Action {
      readonly type = ActionTypes.Remove;
      constructor(public payload: Product) {}
    }

    export class LoadItems implements Action {
      readonly type = ActionTypes.LoadSuccess;
      constructor(public payload: Product[]) {}
    }

    export type ActionsUnion = AddToCart | RemoveFromCart | LoadItems | GetItems;
First, we declare an interface that defines the properties of the `Product` object. Then we go on to declare individual actions to be used.
Actions are typically used to describe events in the application when an event is triggered; a corresponding event is dispatched to handle the triggered events. An action is made up of a simple interface with a single property `type`; the `type` property is a unique identifier for the action.
An action `type` is commonly defined using the following pattern:
[Source] event
The `source` is where the event originates followed by the event description. For example, if you have the following event:
[Product] add to cart
The event source is the `Product` page and the event description is `add to cart`. You can create actions using as an `interface` or a `class`. Classes are easier to use if you need to extend the action with a `payload` property, so that’s what we did.
After creating actions, a type `ActionsUnion` is exported, this export helps define all Actions in this feature area, it exposes the type information of the actions exported. You can read more on creating actions union here.
After creating actions, the next step is to create a reducer that handles transitions of state from the initial to the next based on the action dispatched. Create a file named `reducer.ts` in the `src/app/store` directory. Open the file and update it with the code below:
// src/app/store/reducer.ts
    import { ActionsUnion, ActionTypes } from './actions';

    export const initialState = {
      items: [],
      cart: []
    };

    export function ShopReducer(state = initialState, action: ActionsUnion) {
      switch (action.type) {
        case ActionTypes.LoadSuccess:
          return {
            ...state,
            items: [...state.items, ...action.payload]
          };
        case ActionTypes.Add:
          return {
            ...state,
            cart: [...state.cart, action.payload]
          };
        case ActionTypes.Remove:
          return {
            ...state,
            cart: [...state.cart.filter(item => item.name !== action.payload.name)]
          };
        default:
          return state;
      }
    }
A reducer is a simple, pure function that transitions your applications state from one state to the next. A reducer doesn’t handle side effects; it is a pure function because it returns an expected output for a given input.
First, we have to define the initial state of the application; our application displays a list of `items` and also allow user add and remove items from the `cart`. So the `initialState` of our application features an empty array of `items` and an empty `cart` array.
Next, we’ll define the reducer which is a function featuring a switch statement that acts on the `type` of action dispatched.
- We dispatch the first action type, `LoadSuccess` action when we load products from the server when that happens, the items array is populated with that response.
- The next action type is `Add`, this action is dispatched when a user wishes to add an item to the cart, the action features a `payload` property containing details of the item. The reducer takes the item and appends it to the cart array and returns the state.
- The final case is the `Remove` action; this is an event telling the reducer to remove an item from the cart. The cart is filtered using the `name` of the item dispatched, and the item taken out of the next state.
Actions are also useful for effects such as network requests; in our case fetching items from the server. The effects service handles the final action 'LoadItems'.We’ll look at creating a service to handle fetching the products from the server next.
Registering the reducer
After creating a reducer, it needs to register in the `StoreModule`. Open the `app.module.ts` file and import the `StoreModule` from the ngrx/store library as well as the `ShopReducer` we just created.
//app.module.ts

    import { BrowserModule } from '@angular/platform-browser';
    import { NgModule } from '@angular/core';
    import { StoreModule } from '@ngrx/store';
    import {HttpClientModule} from '@angular/common/http';

    import { AppComponent } from './app.component';
    import { HomeComponent } from './home/home.component';
    import { HeaderComponent } from './header/header.component';

    import { ShopReducer } from './store/reducer';

    @NgModule({
      declarations: [
        AppComponent,
        HomeComponent,
        HeaderComponent,
      ],
      imports: [
        BrowserModule,
        HttpClientModule,
        StoreModule.forRoot({ shop: ShopReducer }),
      ],
      providers: [],
      bootstrap: [AppComponent]
    })
    export class AppModule {}
When registering the `ShopReducer` we assign it a unique identifier (`shop`), this is useful in case you need to register multiple reducers. This need arises in a broader application where several reducers are created to handle different areas of the application.
Fetching products from the server
To handle fetching products from the server, we’ll make use of the ngrx/effects library; the library can be used to interact with services, abstracting them from components. Effects are used in collaboration with actions and reducers to transition state with the data returned after a network request.
First, we’ll create a service that handles fetching items from the server. To create a service using the CLI, run the command below:
ng generate service productsThen open the file and update the content to be similar to the snippet below:
// src/app/products.service.ts
    import { Injectable } from '@angular/core';
    import { HttpClient } from '@angular/common/http';

    @Injectable({
      providedIn: 'root'
    })

    export class ProductsService {
      constructor(private http: HttpClient) {}
      getAll(page, limit = 20) {
        return this.http.get(
          `https://5cafa607f7850e0014629525.mockapi.io/products?page=${page}&limit=${limit}`
        );
      }
    }
Import the `HttpClient`, create a method called `getAll` and return a call to the server to get products using the HttpClient. The method takes two parameters `page` and `limit`; we use these parameters for fetching data and implementing infinite scrolling.
The data is from mockapi.io; it’s a free service for generating data that be consumed by your application. You can easily define a schema and populate it with mock data. You can create yours here or make use of the already generated API above.
Next, we’ll create an effects file that makes the network request using the `ProductService` when the appropriate action is triggered.
Create a file named `effects.ts` within the `src/app/store` directory. Open the file and copy the following code into the file:
import { Injectable } from '@angular/core';
    import { Actions, Effect, ofType } from '@ngrx/effects';
    import { EMPTY } from 'rxjs';
    import { catchError, map, mergeMap } from 'rxjs/operators';
    import { ActionTypes } from './actions';
    import { ProductsService } from '../products.service';

    @Injectable()
    export class ShopEffects {
      constructor(
        private actions$: Actions,
        private productsService: ProductsService
      ) {}

      @Effect()
      loadProducts$ = this.actions$.pipe(
        ofType(ActionTypes.LoadItems),
        mergeMap(({ payload: { page, limit } }) =>
          this.productsService.getAll(page, limit).pipe(
            map(products => {
              return { type: ActionTypes.LoadSuccess, payload: products };
            }),
            catchError(() => EMPTY)
          )
        )
      );
    }
An effect is a service with an `@Effect` decorator. A bit is going on here so we’ll explain each strange keyword used here.
- `Actions` is an observable stream of all the actions dispatched after the application’s state changes.
- From the actions dispatched, we use the `ofType` operator provided by the library to filter the actions with the provided type (`LoadItems` in our case), we can provide one or more action types to the pipeable stream.
- The `mergeMap` operator by RxJS is for flattening and merging the actions into an Observable. Within the callback, we get the `page`, and `limit` from payload sent from the event.
- Then we call the `getAll` method using the `page` and `limit` as parameters, it returns an observable that is mapped, and then we dispatch response as an action provided there was no error.
- The `catchError` operator handles any errors encountered during the process.
After creating effects, we have to register it in the root module. Open the `app.module.ts` file and update it to fit the snippet below:
import { BrowserModule } from '@angular/platform-browser';
    ...
    import { EffectsModule } from '@ngrx/effects';
    import { ShopEffects } from './store/effects';

    @NgModule({
      declarations: [
        ...
      ],
      imports: [
        ...
        EffectsModule.forRoot([ShopEffects])
      ],
      ...
    })
    export class AppModule {}
In the `EffectsModule,` we can register our effects `ShopEffects`. We can register multiple effects can by adding the effects to the array.
Now that we’ve created actions to handle events in our application and reducers to transition state let’s populate the store with items from the server using the effects. Before we do that, let’s define views for the product and products list.
Products list view
Run the following commands to generate components for the product item and product list:
ng generate component productAlso, for the product list run:
ng generate component product-list
Open the `product.component.html` file in the `src/app/product` directory and update with the code below:
// src/app/product/product.component.html

    <div class="product">
      <div class="product-image-holder">
        <img [src]="product.image" [alt]="product.name" class="product-image" />
      </div>
      <div class="product-details">
        <p class="product-details__name">{{ product.name }}</p>
        <p class="product-details__price">${{ product.price }}</p>
      </div>
      <div class="product-description">
        <p>{{ product.description }}</p>
      </div>
      <div class="product-actions">
        <button
          class="product-actions__add"
          (click)="addToCart(product)"
          *ngIf="!inCart"
        >
          <img src="/assets/images/add-to-cart.svg" alt="add to cart" />
        </button>
        <button
          class="product-actions__remove"
          (click)="removeFromCart(product)"
          *ngIf="inCart"
        >
          <img src="/assets/images/remove-from-cart.svg" alt="remove from cart" />
        </button>
      </div>
    </div>
Here we have two buttons for adding to and removing an item from the cart. A flag `inCart` is used to determine which of the button to display.
- Note: All image assets can be found in the GitHub repository [here]
Let’s style the component by updating the `product.component.scss` file with the styles below:
// product.component.scss

    %button {
      border-radius: 50%;
      display: flex;
      justify-content: center;
      align-items: center;
      height: 32px;
      width: 32px;
      cursor: pointer;
      &:hover {
        transform: scale(1.1);
      }
      img {
        width: 16px;
        height: 16px;
      }
    }
    .product {
      box-shadow: 0 1px 1px 0 rgba(0, 0, 0, 0.2);
      border-radius: 5px;
      margin: 0 15px 30px 0;
      width: 286px;
      max-height: 400px;
      height: 320px;
      background: white;
      &:hover {
        transform: scale(1.05);
        .product-actions {
          display: flex;
        }
      }
      &-image {
        max-width: 100%;
        width: 300px;
        border-top-right-radius: 5px;
        border-top-left-radius: 5px;
        height: 180px;
        object-fit: cover;
      }
      &-details {
        display: flex;
        justify-content: space-between;
        padding: 8px 15px;
        &__price {
          font-weight: 600;
          color: #88C058;
          opacity: 0.7;
          font-size: 15px;
          letter-spacing: 1px;
          margin: 0;
        }
        &__name {
          opacity: 0.9;
          font-weight: 600;
          margin: 0;
        }
      }
      &-description {
        padding: 10px 15px;
        p {
          opacity: 0.5;
          margin: 0;
          font-size: 15px;
        }
      }
      &-actions {
        display: none;
        justify-content: flex-end;
        padding: 0 15px;
        &__add {
          @extend %button;
          border: 2px solid rgba(0, 0, 0, 0.3);
        }
        .k-icon {
          color: rgb(52, 186, 219);
          font-size: 18px;
        }
        &__remove {
          @extend %button;
          border: 2px solid orangered;
          .k-icon {
            color: orangered;
            font-size: 18px;
          }
        }
      }
    }
Open the `product.component.ts` file and update it with the variables and methods used in the HTML file.
// src/app/product/product.component.ts

    import { Component, Input, OnInit } from '@angular/core';
    import { Store } from '@ngrx/store';
    import { AddToCart, RemoveFromCart } from '../store/actions';

    export interface Product {
      name: string;
      price: number;
      description: string;
      image: string;
    }

    @Component({
      selector: 'app-product',
      templateUrl: './product.component.html',
      styleUrls: ['./product.component.scss']
    })
    export class ProductComponent implements OnInit {
      constructor(private store: Store<{ items: []; cart: [] }>) {}

      inCart = false;
      @Input() product: Product;

      addToCart(item: Product) {
        this.store.dispatch(new AddToCart(item));
        this.inCart = true;
      }

      removeFromCart(item: Product) {
        this.store.dispatch(new RemoveFromCart(item));
        this.inCart = false;
      }
      ngOnInit() {}
    }
First, we import the `Store` observable from the `ngrx/store` library. We use the store property to dispatch actions.
The `addToCart` method takes one parameter (`item`); the method dispatches an action to add an item to cart. After dispatching the action, the `inCart` property is set to `true`. This flag is for identifying which items are in the cart.
Meanwhile, the `removeFromCart` method dispatches an action to remove an item from the cart and updates the `inCart` property to `false`.
Next, we’ll render the `Product` component in the `product-list` component. Open the `product-list.component.html` file and render the `Product` similar to the snippet below:
<!-- product-list.component.html -->
    <div class="product-list">
      <app-product *ngFor="let product of products" [product]="product"></app-product>
    </div>
We’ll add some styles to the component’s stylesheet. Open the `product-list.component.scss` file and add the styles below:
.product-list {
      padding: 10px 0;
      margin-top: 30px;
      display: flex;
      flex-wrap: wrap;
    }
The product list component receives an `Input` from the `Home` component, so let’s update the component to take an `Input` an array of `products`. Update the `product-list.component.ts` file to be similar to the snippet below:
import { Component, Input, OnInit } from '@angular/core';
    import { Product } from '../product/product.component';

    @Component({
      selector: 'app-product-list',
      templateUrl: './product-list.component.html',
      styleUrls: ['./product-list.component.scss']
    })
    export class ProductListComponent implements OnInit {
      constructor() {}

      @Input() products: Product[] = [];

      ngOnInit() {}
    }
After making this change, the final step is to render the product list component in the `home.component.html` file and dispatch an action to load the products from the server in the `OnInit` lifecycle of the component.
Open the `home.component.html` file and render the product list component within the element with the `product-area` class attribute:
<main>
      <section class="banners">
        ...
      </section>
      <section class="product-area">
        <app-product-list [products]="items"></app-product-list>
      </section>
    </main>
Then update the home component and make it similar to the snippet below:
import { Component, OnInit } from '@angular/core';
    import { select, Store } from '@ngrx/store';
    import { GetItems } from '../store/actions';
    import { Product } from '../product/product.component';

    @Component({
      selector: 'app-home',
      templateUrl: './home.component.html',
      styleUrls: ['./home.component.scss']
    })
    export class HomeComponent implements OnInit {
      constructor(private store: Store<{ items: Product[]; cart: [] }>) {
        store.pipe(select('shop')).subscribe(data => (this.items = data.items));
      }

      items: Product[] = [];
      banners = [
        ...
      ];

      ngOnInit() {
        this.store.dispatch(new GetItems({page: 1, limit: 20}));
      }
    }
First, we dispatch a new action `GetItems`, the action type was registered in the effect that handled fetching products from the server. After dispatching the action, we use the `Store` observable and the `select` operator to select and subscribe to the store we registered in the `AppModule` file.
When subscribed to the store, the data returned is the current state of our store. If you remember, the initial state of our store had two properties both of which are arrays. In the home component, we need the array of items in the store, so using dot notation, we’ll get the current items from the state.
After this change, if you visit http://localhost:4200, you should see all the latest changes we’ve made, including the ability to add and remove an item from the cart.

If you try adding an item to the cart, you’ll notice it is successful, but our cart doesn’t update with the number of items in the cart. Well, this is because we didn't subscribe to the store, so that means we don't get the latest updates on the cart.
To fix this, open the `header.component.html` file and update the component to subscribe to the store in the component’s constructor.
import { Component, OnInit, Input } from '@angular/core';
    import { select, Store } from '@ngrx/store';
    import { Product } from '../product/product.component';

    @Component({
      ..
    })
    export class HeaderComponent implements OnInit {
      constructor(private store: Store<{ items: []; cart: [] }>) {
        store.pipe(select('shop')).subscribe(data => (this.cart = data.cart));
      }

      cart: Product[] = [];
      ngOnInit() {}
    }
Similar to the `Home` component where we subscribed to the store and got the `items` array from the state. Here we’ll be subscribing to the `cart` property of the state.
After this update, you should see the number of items in cart when an item is added or removed from the cart.
- Note: Ensure both the Angular dev server is running on port **4200** and the server is running on port **4000**
Implementing infinite scroll
Infinite scrolling is a technique used where content is loaded on demand when a user scrolls to a defined location on the web page. This technique has been adopted by several e-commerce platforms to ensure that the user always has data to browse through.
To achieve this functionality in our application, we’ll be making use of a library called [ngx-infinite-scroll]. It has simple APIs that we can use to check if the user is approaching the end of the list. An event is triggered to load more products when this happens.
To get started we’ll import the `InfiniteScrollModule` into the `app.module.ts`, open the file and add the `InfiniteScrollModule` to the list of imports:
// src/app/app.module.ts

    import { BrowserModule } from '@angular/platform-browser';
    // ... other imports
    import { InfiniteScrollModule } from 'ngx-infinite-scroll';

    @NgModule({
      declarations: [
        // ... declarations
      ],
      imports: [
        // ... other imports
        InfiniteScrollModule,
      ],
      providers: [],
      bootstrap: [AppComponent],
    })
    export class AppModule {}
The next step is attaching the `*infinite-scroll*` directive to the product list element. Open the `product-list.component.html` file and update it to be similar to the code below:
https://gist.github.com/08521fc70c48075e209c81a54c62ac7e
We attach the `infinite-scroll` directive on the `.product-list` element, we also pass values to the directive:
infiniteScrollDistance: this is the distance the user travels within the container before the infinite scroll is triggered.
infiniteScrollThrottle: number of milliseconds for throttle. The delay time the trigger of the scroll event after the user stops scrolling.
scrolled: this is an event that triggers when the distance threshold close or reached.
Next, we’ll update the component file to declare the variables we used in the view template, open the `product-list.component.ts` file and update it to match the snippet below:
import { Component, Input, OnInit } from '@angular/core';
import { Store } from '@ngrx/store';
import { LoadItems, GetItems } from '../store/actions';
import { Product } from '../product/product.component';
import { ProductsService } from '../products.service';

@Component({
  selector: 'app-product-list',
  templateUrl: './product-list.component.html',
  styleUrls: ['./product-list.component.scss'],
})
export class ProductListComponent implements OnInit {
  constructor(
    private productService: ProductsService,
    private store: Store<{ items: []; cart: [] }>
  ) {}
  @Input() products: Product[] = [];

  throttle = 300;
  scrollDistance = 0.2;
  limit = 20;
  page = 1;

  onScrollEnd() {
    this.page += 1;
    if (this.page <= 5) {
      this.store.dispatch(new GetItems({ page: this.page, limit: this.limit }));
    }
  }
  ngOnInit() {}
}
In the snippet above we declared the values we used in the template. The new values defined are used to denote the throttle time, the scroll distance, page and limit. Also, we created an event listener for the `scrolled` event; within the handler, we increment the page and dispatch an action to fetch more products from the new page.
We added a check to prevent unnecessary calls to the server (`this.page <= 5`), usually your server provides pagination information that tells you when there are no more products to load but ours doesn’t so we did that.
If you navigate to http://localhost:4200, you’ll notice that more products are added when you scroll close to the bottom of the `product-list` container.
Conclusion
In this tutorial, we’ve built a simple store where items can be added and removed from the cart, we’ve been able to manage the application’s state using ngrx/store. We’ve also seen how to implement infinite scrolling with the help of the ngx-infinite-scroll library. Infinite scrolling can be a useful addition to your web application if implemented correctly. You should always watch to avoid scroll jank by using passive scroll listeners and removing unused listeners. You can find the demo of this article in the repository [here].
You can learn more about Infinite Scrolling and about AG Grid Angular Support here, we have an Angular Quick Start Guide and all our examples have Angular versions.