
This blog demonstrates how to write unit tests for your AG Grid React Tables with React Testing Library and Vitest, focusing on common challenges and scenarios.
You can find the complete code for this blog in this GitHub repository.
These tools provide more accurate results because Vitest and React Testing Library rely on jsdom to simulate the browser environment, which has inherent limitations.
Content
- Project setup
- Test rendering
- Asynchronous data loading
- Custom renderer
- Testing user interactions
- Conclusion
Project setup
Create a new React project using Vite:
npm create vite@latest <your-project-name> -- --template react-tsChange directory to your newly created app and install the necessary packages with the following command:
cd <your-project-name>
npm install
npm run dev
Create a new AG Grid Component
Next, go ahead and create a new AG Grid component in your React application. Run the following command to install AG Grid npm package.
npm install ag-grid-react --saveNext, open the index.css file and delete all the styles. Replace all the code in your App.tsx file with the following code:
import { useState, useMemo } from "react";
import { AllCommunityModule, ModuleRegistry, ColDef } from "ag-grid-community";
import { AgGridReact } from "ag-grid-react";

export type ICar = {
	make: string;
	model: string;
	price: number;
	electric: boolean;
}

ModuleRegistry.registerModules([AllCommunityModule]);

function App() {
	// Row Data: The data to be displayed.
	const [rowData, setRowData] = useState([
		{ make: "Tesla", model: "Model Y", price: 64950, electric: true },
		{ make: "Ford", model: "F-Series", price: 33850, electric: false },
		{ make: "Toyota", model: "Corolla", price: 29600, electric: false },
		{ make: "Mercedes", model: "EQA", price: 48890, electric: true },
		{ make: "Fiat", model: "500", price: 15774, electric: false },
		{ make: "Nissan", model: "Juke", price: 20675, electric: false },
	]);

	// Column Definitions: Defines & controls grid columns.
	const [colDefs, setColDefs] = useState<ColDef<ICar>[]>([
		{ field: 'make', editable: true, filter: true },
		{ field: 'model' },
		{ field: 'price', editable: true },
		{ field: 'electric' },
	]);


	const defaultColDef = useMemo(() => {
		return {
			flex: 1
		};
	}, []);

	// Container: Defines the grid's theme & dimensions.
	return (
		<div style={{ width: "100%", height: '100vh' }}>
			<AgGridReact
				rowData={rowData}
				columnDefs={colDefs as any}
				defaultColDef={defaultColDef}
			/>
		</div>
	);
}

export default App
Configure React Testing Library and Vitest
Install the required libraries to configure testing for your project:
npm install -D \
  vitest \
  @testing-library/react \
  @testing-library/jest-dom \
  @testing-library/user-event \
  jsdom \
  @types/jest
Next, update your vite.config.ts file as follows:
import { defineConfig, UserConfig } from 'vite'
import react from '@vitejs/plugin-react'

export default defineConfig({
  plugins: [react()],
  test: {
    globals: true,
    environment: 'jsdom',
    setupFiles: './src/test/setup.ts',
    css: true,
  },
} as UserConfig)
The test configuration in the vite.config.ts file sets up the testing environment for your React application using Vitest.
globals: trueoption allows you to use functions like describe, test, and expect without importing them in every test file.environment: 'jsdom'simulates a browser environment so you can test DOM interactions and React components as if they were running in a real browser.setupFiles: './src/test/setup.ts'specifies a file that runs before your tests, letting you configure or initialize any testing utilities you need. You can run any utility functions in the setup.ts file.
Create the src/test/setup.ts file and add the following code:
import "@testing-library/jest-dom";
import { cleanup } from "@testing-library/react";
// Ensure cleanup after each test
afterEach(() => {
 cleanup();
});
Let’s break down the code in this file:
- It imports custom Jest Matchers
@testing-library/jest-domand thecleanuputility from@testing-library/react - It calls
cleanup()function so that any mounted React components are removed from the DOM once a test completes.
Finally, add the test scripts to your package.json file:
{
  ...rest of the file
  "scripts": {
    ...rest of the file
    "test": "vitest run",
    "coverage": "vitest run --coverage"
  }
}
With this, you should be ready for testing!
Test rendering
Create a new file inside the src directory called App.test.tsx and add the following code to the file:
import { render, screen } from "@testing-library/react";
import "@testing-library/jest-dom"; // For additional matchers
import App from "./App";

describe("AG Grid component rendering", () => {
  test("renders the AG Grid container", () => {
     render(<App />);
     // Verify the grid container is rendered
     const gridContainer = screen.getByRole("grid");
     expect(gridContainer).toBeInTheDocument();
  });
});
The above code verifies that the AG Grid is being rendered correctly in the App component.
Run the test using the following command:
npm run test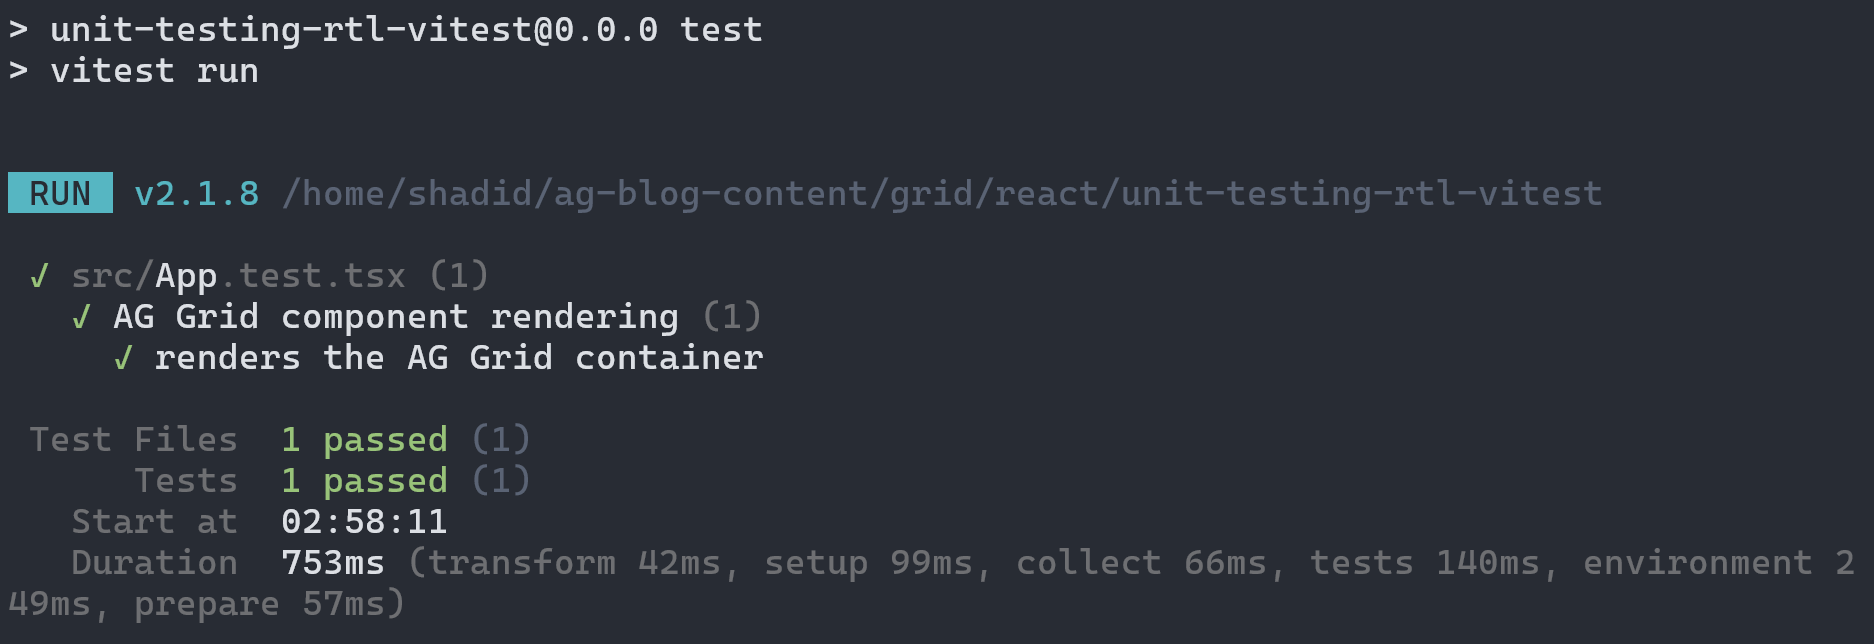
Let’s go ahead and add a couple more tests, starting with a test to check the number of rows:
test("renders the correct number of rows", async () => {
   render(<App />);

   // Wait for one known cell to appear so that we know data has loaded
   await screen.findByText("Tesla");

   // Wait for rows to render
   const rows = await screen.findAllByRole("row");

   // Header row + 6 data rows = 7 rows in total
   expect(rows).toHaveLength(7);
});
Next, we'll create a test to check if the column headers are printed correctly:
test("renders the correct column headers", async () => {
  const { container } = render(<App />);

  // Find all header text elements using querySelector
  const headerTexts =
    Array.from(container.getElementsByClassName('ag-header-cell-text')) as HTMLElement[];
  const expectedHeaders = ["Make", "Model", "Price", "Electric"];

  headerTexts.forEach((header, index) => {
    expect(header.innerHTML).toBe(expectedHeaders[index]);
  });
});
The above test finds all elements with the class ag-header-cell-text and converts them to an array of HTML elements. It then checks that each header's text content exactly matches the expected headers
Finally, we'll add a test to verify that your AG Grid component correctly displays specific row data:
test("renders the correct row data", async () => {
   render(<App />);

   // Check if the specific row data is rendered
   const makeCell = await screen.findByText("Tesla");
   const modelCell = await screen.findByText("Model Y");

   // Verify row data is displayed
   expect(makeCell).toBeInTheDocument();
   expect(modelCell).toBeInTheDocument();
});
Dealing with Column Virtualization in tests
AG Grid uses a feature called Column Virtualization, which inserts and removes columns as you scroll horizontally to boost performance. Because there’s no column “buffer”, only the columns within the visible area are rendered. While this is great for real-world performance, it can lead to missing columns during tests.
For example, with React Testing Library, you may find that certain columns aren’t in the DOM at test time, causing queries like getByText("Price") to fail even though they work fine in the browser. This happens because the column isn’t rendered if it’s not in the current viewport.
Here’s a quick test that might fail if the “Price” column isn’t visible:
test('renders all the headers', async () => {
  const { getByText } = render(<App />);
  expect(getByText("Make")).toBeInTheDocument();  // PASS
  expect(getByText("Price")).toBeInTheDocument(); // FAIL (May not find it)
});Disabling Column Virtualization for Testing:
To fix this, disable column virtualization specifically for your test environment. You can do this by setting the suppressColumnVirtualisation property:
<AgGridReact
  suppressColumnVirtualisation={true}
  // ... rest of the props
>
When suppressColumnVirtualisation is true, all columns will be rendered, ensuring React Testing Library sees everything. However, make sure to keep column virtualization enabled in production for better performance.
Asynchronous data loading
Next, let’s write some unit tests to verify asynchronous data loading is working as expected. First, let’s create a mock API endpoint to fake an API response with delay.
Create a new file called src/components/api.ts and add the following code:
export type IDataType = {
  make: string;
  model: string;
  price: number;
  electric: boolean;
}

export async function fetchData(): Promise<IDataType[]> {
  // Mock a 1-second delay
  await new Promise((resolve) => setTimeout(resolve, 1000));

  // Return the data
  return [
    { make: "Tesla", model: "Model Y", price: 64950, electric: true },
    { make: "Ford", model: "F-Series", price: 33850, electric: false },
    { make: "Toyota", model: "Corolla", price: 29600, electric: false },
    { make: "Mercedes", model: "EQA", price: 48890, electric: true },
    { make: "Fiat", model: "500", price: 15774, electric: false },
    { make: "Nissan", model: "Juke", price: 20675, electric: false },
  ];
}
The above code block provides a mock data-fetching function that simulates retrieving a list of car details.
Next, update the App.tsx code so that it retrieves data from this fake endpoint instead of hardcoding it.
import { useState, useMemo, useEffect } from "react";
import { AllCommunityModule, ModuleRegistry, ColDef } from "ag-grid-community";
import { AgGridReact } from "ag-grid-react";
import { fetchData, IDataType } from "./components/api";

export type ICar = {
  make: string;
  model: string;
  price: number;
  electric: boolean;
}

ModuleRegistry.registerModules([AllCommunityModule]);

function App() {
  const [rowData, setRowData] = useState<IDataType[] | null>(null);

  useEffect(() => {
    fetchData().then((data) => {
      setRowData(data);
    });
  }, []);

  // Column Definitions: Defines & controls grid columns.
  const [colDefs, setColDefs] = useState<ColDef<ICar>[]>([
      { field: 'make', editable: true, filter: true },
      { field: 'model' },
      { field: 'price', editable: true },
      { field: 'electric' },
  ]);

  const defaultColDef = useMemo(() => {
      return {
          flex: 1
      };
  }, []);

  return (
      <div style={{ width: "100%", height: '100vh' }}>
          <AgGridReact
              rowData={rowData}
              columnDefs={colDefs as any}
              defaultColDef={defaultColDef}
          />
      </div>
  );
}

export default App
Now, in your App.test.tsx file, you can mock the API endpoint as follows:
// ... Rest of the code
import { describe, test, expect, vi } from "vitest";

vi.mock("./api", () => ({
  fetchData: vi.fn().mockResolvedValue([
    { make: "Tesla", model: "Model Y", price: 64950, electric: true },
    { make: "Ford", model: "F-Series", price: 33850, electric: false },
    { make: "Toyota", model: "Corolla", price: 29600, electric: false },
    { make: "Mercedes", model: "EQA", price: 48890, electric: true },
    { make: "Fiat", model: "500", price: 15774, electric: false },
    { make: "Nissan", model: "Juke", price: 20675, electric: false },
  ]),
}));

// ... Rest of the code
describe("AG Grid component rendering", () => {// ...})
Finally, write a test suite to verify the async data loading functionality.
// ... Rest of the code

describe("Load async data", () => {
  test("displays loading state before data arrives", () => {
    const { container } = render(<App />);
    const loadingElement = container.querySelector('.ag-overlay-loading-center');
    expect(loadingElement).toBeInTheDocument();
  });

  test("renders AG Grid with data after async fetch", async () => {
    render(<App />);

    // Wait for mocked row data to appear
    const firstRowMakeCell = await screen.findByText("Toyota");
    expect(firstRowMakeCell).toBeInTheDocument();

    // The loading text should now be gone
    expect(screen.queryByText("Loading...")).not.toBeInTheDocument();
  });
});
The above test suite has two test cases.
- The first test case ensures the application shows a loading indicator while data is being fetched.
- The second test verifies the AG Grid component renders with the fetched data.
Run your tests with the following command and verify they are passing:
npm run test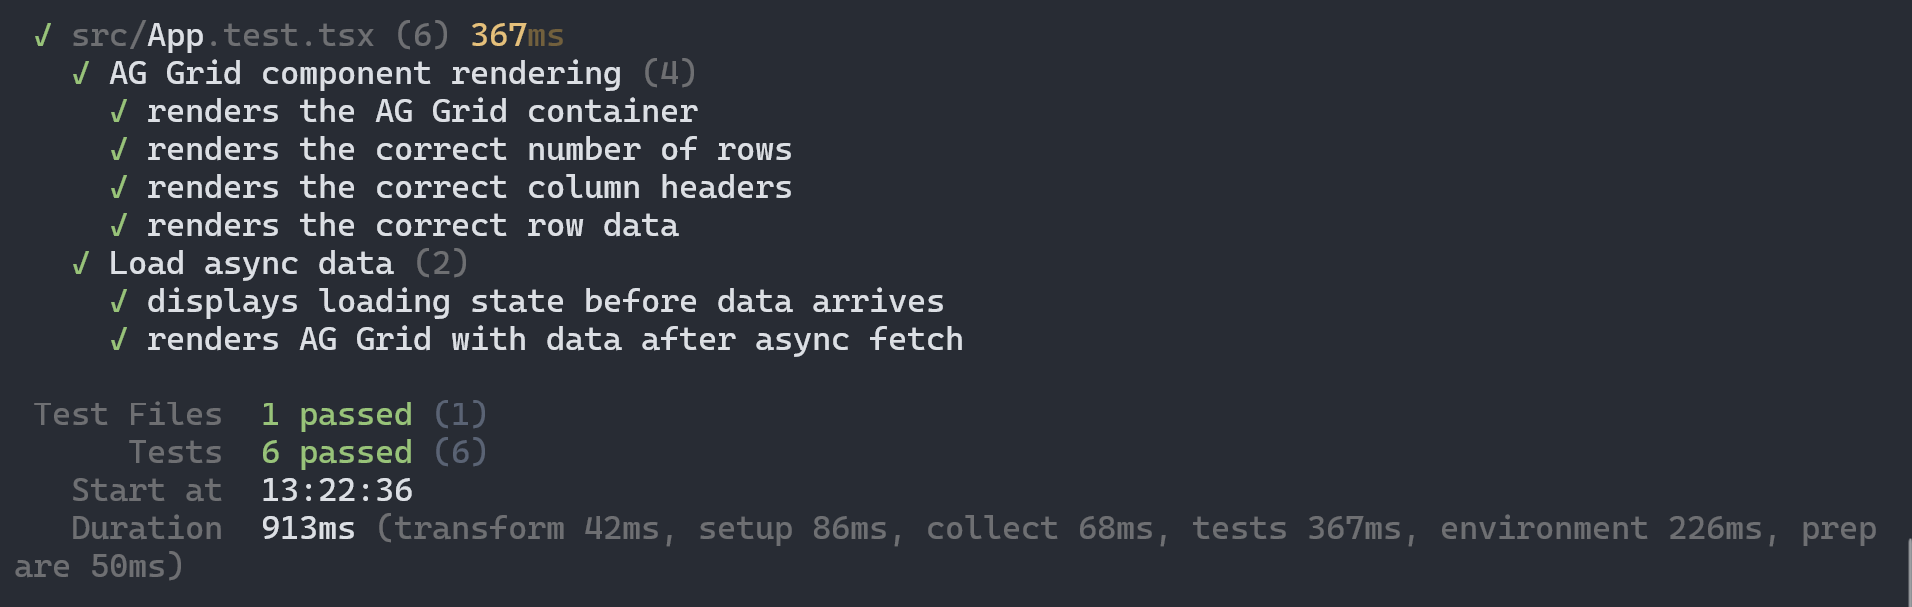
Custom renderer
Unit testing custom cell renderers ensures that the core logic of custom components inside a cell work as intended in isolation, without involving the complexity of the entire grid.
Create a new file src\components\ActionButton.tsx and add the following code to create a custom button component.
import React from 'react';

interface PriceCellButtonProps {
  value: number;
  children: React.ReactNode;
}

export default function PriceCellButton(props: PriceCellButtonProps) {
  const onButtonClick = () => {
      console.log(`Price is: ${props.value}`);
      alert(`Price is: ${props.value}`);
  };
  return (
      <button data-testid="action-button" onClick={onButtonClick}>
          {props.children}
      </button>
  );
}
Then update the column definitions to add a new column that will render the custom button component:
// App.tsx
import ActionButton from './components/ActionButton';

// Column Definitions: Defines & controls grid columns.
const [colDefs, setColDefs] = useState<ColDef<ICar>[]>([
  { field: 'make', editable: true, filter: true },
  { field: 'model' },
  { field: 'price', editable: true },
  { field: 'electric' },
  { field: 'actions',
      cellRenderer: (props: { data: { price: number; }; }) =>
          <ActionButton value={props.data.price} children={'Launch'} />
  }
]);
Update the ICar type as well to have an actions field:
export type ICar = {
  make: string;
  model: string;
  price: number;
  electric: boolean;
  actions: React.ReactNode;
}
We have changed the number of columns in the grid so we have to update the test that checks for a number of columns. Update the test as follows:
test("renders the correct column headers", async () => {
  // ... rest of the code stays same

  const expectedHeaders = ["Make", "Model", "Price", "Electric", "Actions"];

  // ... resto of the code stays same
});
Next, let's write a test suite that verifies the behaviour of the ActionButton component as a custom cell:
import { fireEvent, render, screen } from '@testing-library/react';

describe("ActionButton component (Custom cell renderer)", () => {
  test("renders ActionButton in the column", async () => {
    render(<App />);
    // Verify button is rendered
    const buttons = await screen.findAllByTestId("action-button");
    expect(buttons).toHaveLength(6);
  });

  test("calls the onClick handler with the correct value",
    async () => {
      render(<App />);
      const mockValue = 64950;

      // Mock alert function
      const mockAlert = vi.spyOn(window, "alert").mockImplementation(() => {});

      // Simulate button click
      const button = (await screen.findAllByTestId("action-button")).at(0);
      if (!button) {
        throw new Error("Button not found");
      }
      await fireEvent.click(button);

      // Verify alert was called with the correct value
      expect(mockAlert).toHaveBeenCalledWith(`Price is: ${mockValue}`);

      // Cleanup mock
      mockAlert.mockRestore();
    }
  );
});
The test suite has two tests.
- The first test ensures that the
ActionButtoncomponents are rendered in the correct column for each row of the grid. - The second test verifies that clicking on an
ActionButtontriggers itsonClickhandler and displays an alert with the correct value.
Testing user interactions
User interactions such as sorting, filtering and editing are typically tested as end-to-end (E2E) scenarios rather than unit tests. Such tests are better performed with tools such as Playwright or Cypress etc.
Check out the previous blog post to learn more about performing E2E tests for AG Grid components with Playwright.
Conclusion
By following these testing practices, you can ensure your AG Grid implementations remain stable and function as expected. While unit tests are excellent for verifying component behavior and data display, complex user interactions are often better covered by end-to-end tests using tools like Playwright or Cypress.
If you’re an enterprise user and need further assistance with testing strategies, feel free to contact us through Zendesk.