
This tutorial demonstrates how to write e2e (end-to-end) tests for your AG Grid React Table components with Cypress.
You can find the complete code for this tutorial in the following GitHub repo.
Contents
Project setup
Create a new React project by running the following command:
npm create vite@latest testing-ag-grid -- --template react-tsChange the directory to your newly created app and install the necessary packages with the following command:
cd testing-ag-grid
npm install
npm run dev
Create a new AG Grid component
Next, go ahead and create a new AG Grid component in your React application. Run the following command to install AG Grid npm package.
npm install ag-grid-reactNext, open the index.css file and delete all the styles and replace all the code in your App.tsx file with the following code:
import { useState, useMemo } from "react";
import { AllCommunityModule, ModuleRegistry, ColDef } from "ag-grid-community";
import { AgGridReact } from "ag-grid-react";

export type ICar = {
  make: string;
  model: string;
  price: number;
  electric: boolean;
};

ModuleRegistry.registerModules([AllCommunityModule]);

function App() {
  // Row Data: The data to be displayed.
  const [rowData, setRowData] = useState<ICar[]>([
    { make: "Tesla", model: "Model Y", price: 64950, electric: true },
    { make: "Ford", model: "F-Series", price: 33850, electric: false },
    { make: "Toyota", model: "Corolla", price: 29600, electric: false },
    { make: "Mercedes", model: "EQA", price: 48890, electric: true },
    { make: "Fiat", model: "500", price: 15774, electric: false },
    { make: "Nissan", model: "Juke", price: 20675, electric: false },
  ]);

  // Column Definitions: Defines & controls grid columns.
  const [colDefs, setColDefs] = useState<ColDef<ICar>[]>([
    { field: "make", editable: true, filter: true },
    { field: "model" },
    { field: "price", editable: true },
    { field: "electric" },
  ]);

  const defaultColDef = useMemo(() => {
    return {
      flex: 1
    };
  }, []);

  return (
    <div style={{ width: "100%", height: '100vh' }}>
      <AgGridReact
        rowData={rowData}
        columnDefs={colDefs}
        defaultColDef={defaultColDef}
      />
    </div>
  );
}

export default App
Configure Cypress
First install the necessary dependencies by running the following command:
npm install cypress --save-devNext, run the following command to configure Cypress in you project:
npx cypress openWhen you run the command above, a new browser window opens. You'll be presented with a page similar to the one below. This page gives you the option to setup different types of tests.
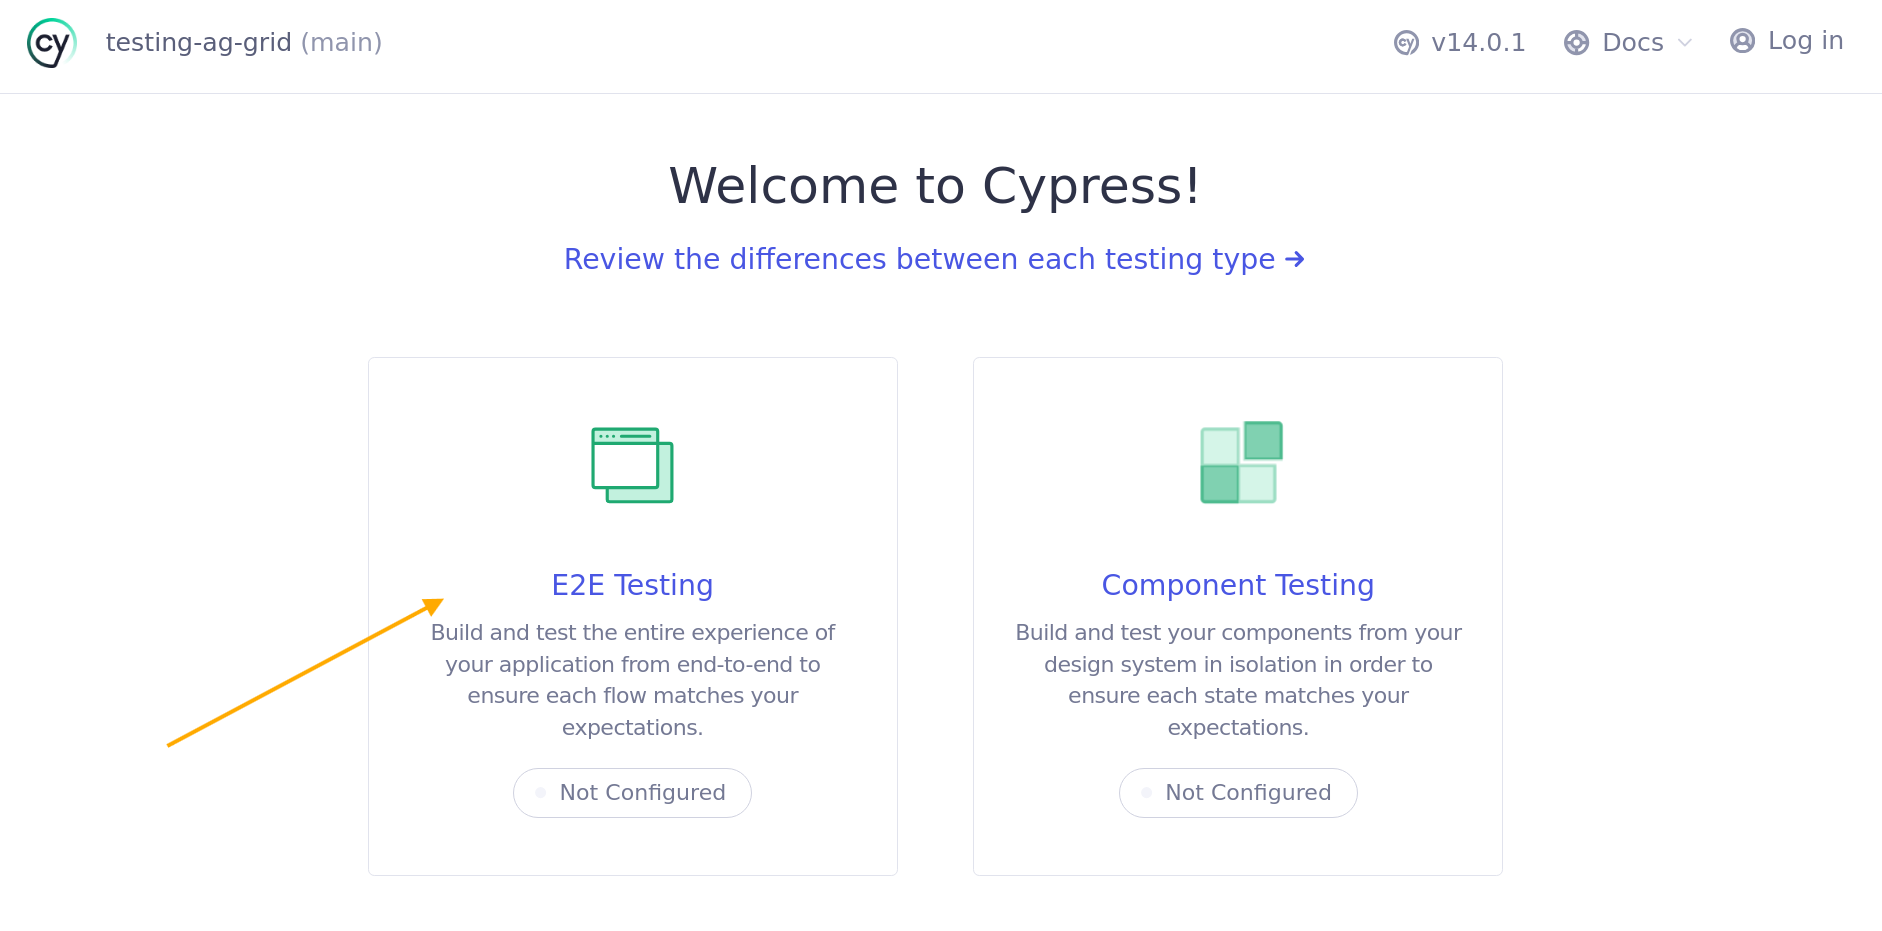
Select the E2E Testing option as that is what we will be focusing on in this tutorial.
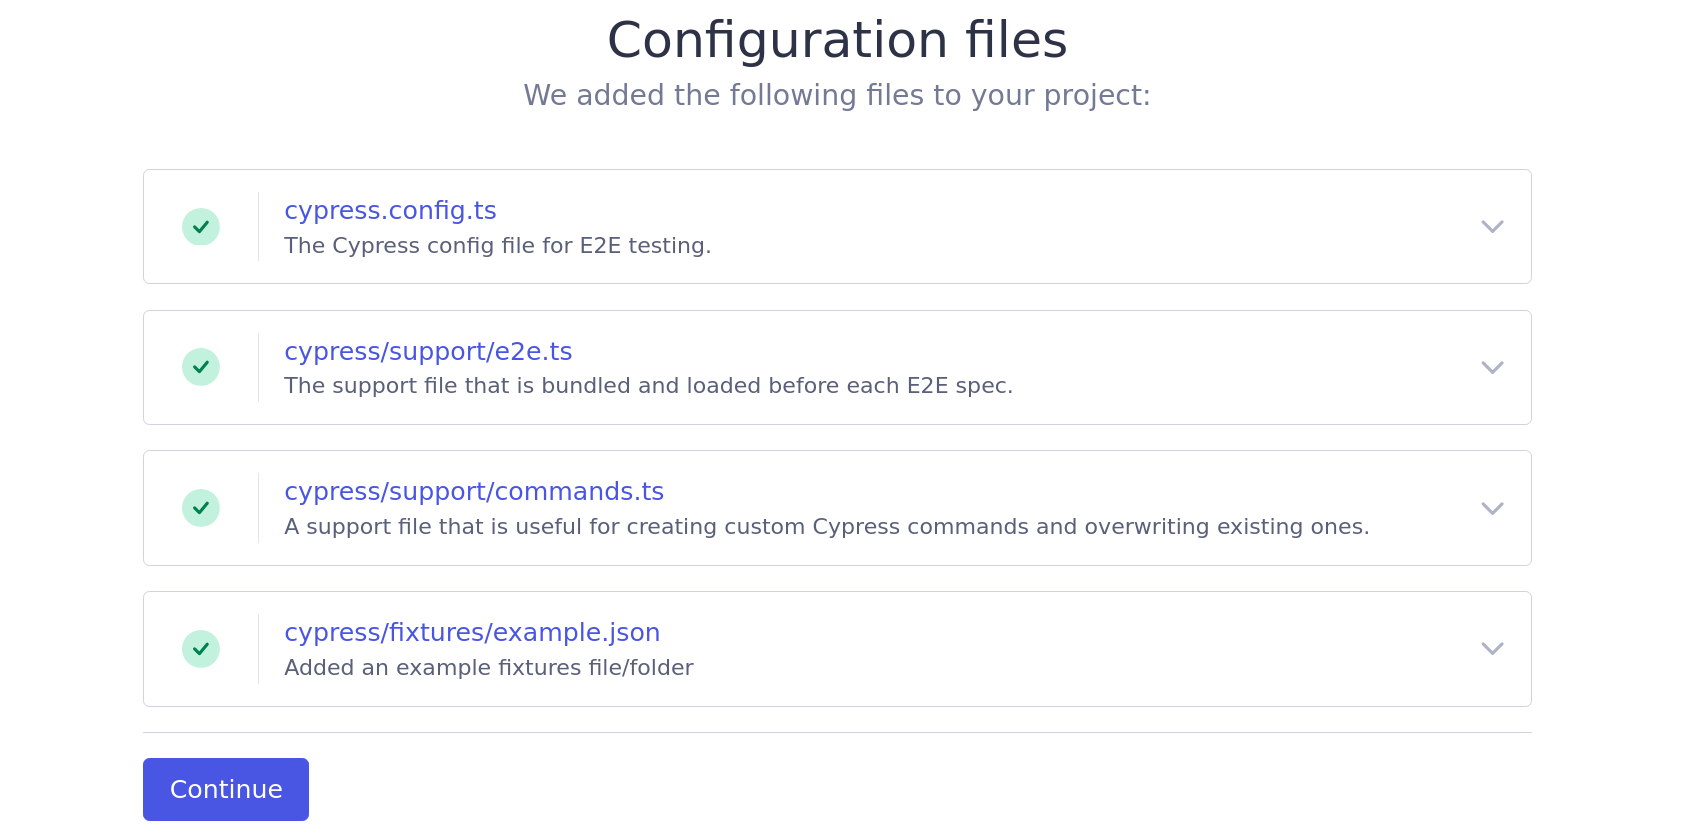
Next, Cypress will give you a list of configuration files that it generated. These files provide project-specific configurations. You can learn more about them here. Select continue to proceed.
At this point, you may get an error as follows. If you do get this error, change the cypress.config.ts file to cypress.config.js
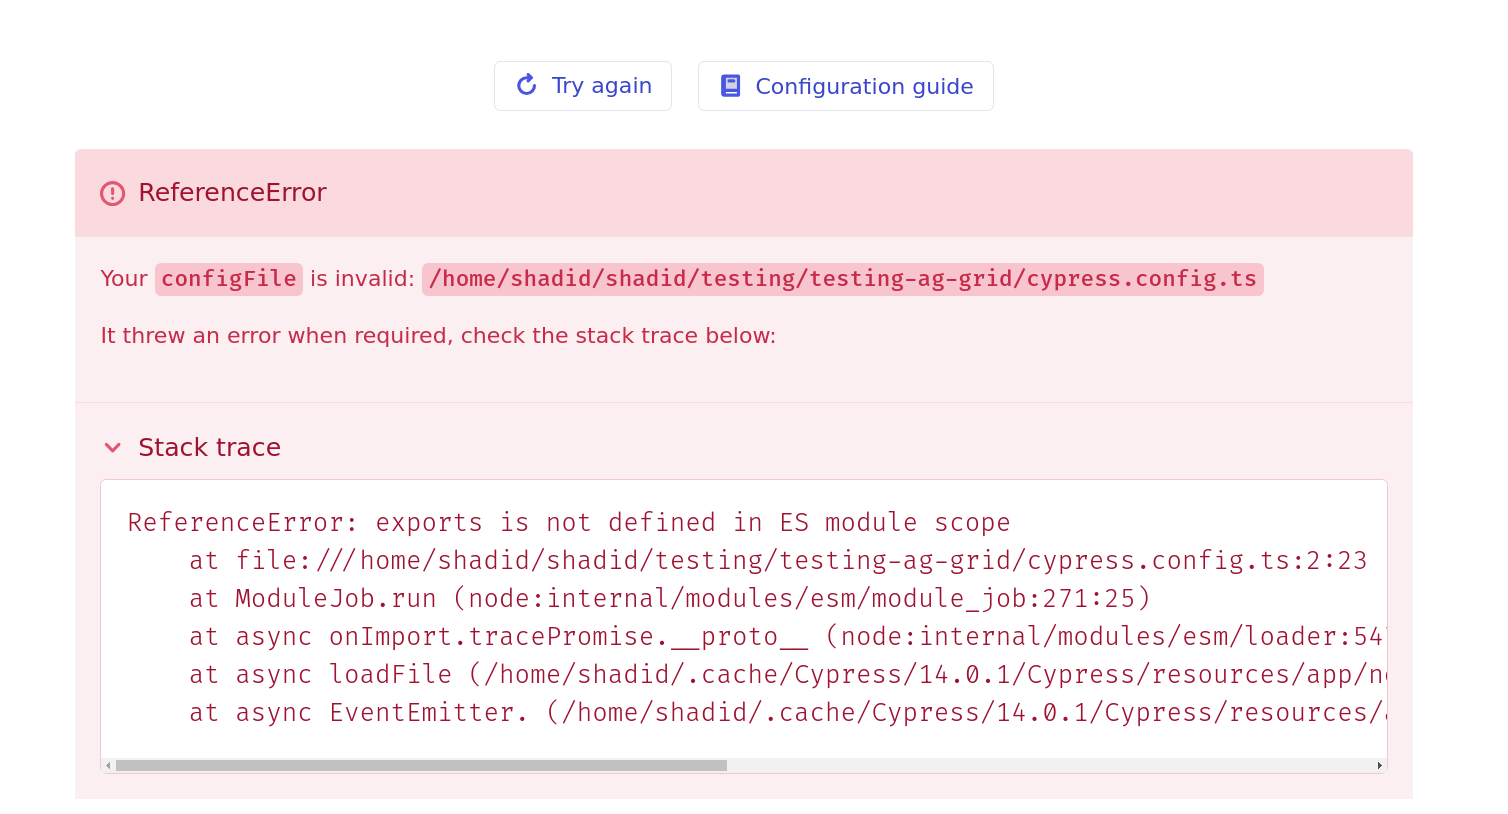
After you change the file extension of cypress.config from .ts to .js select "Try again".
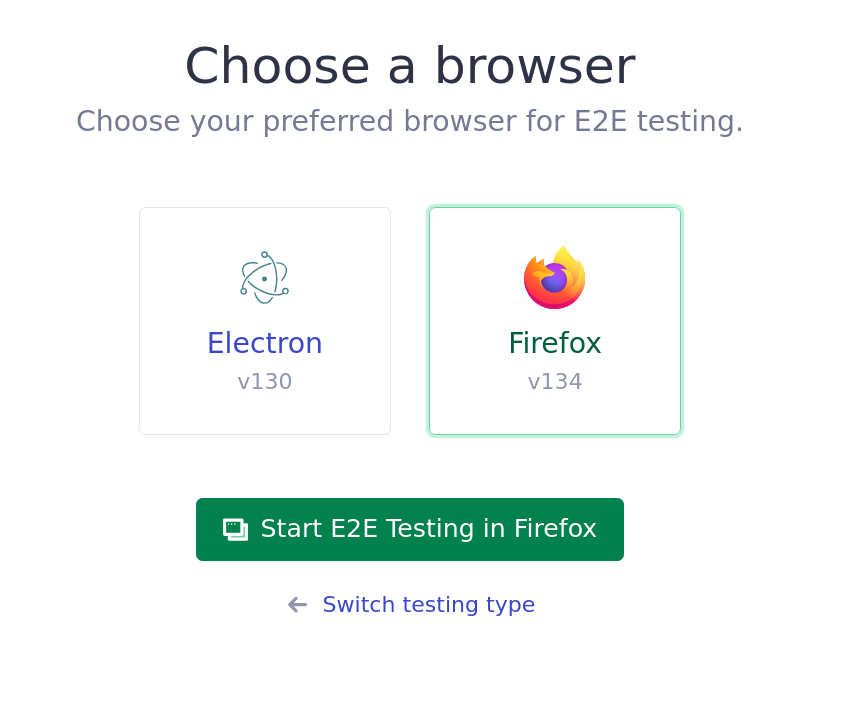
Next, choose either a web browser (Firefox or Chrome) or an Electron app. This tells Cypress whether you're setting up tests for a web or Electron application. Select the web browser option and then select "start e2e testing".
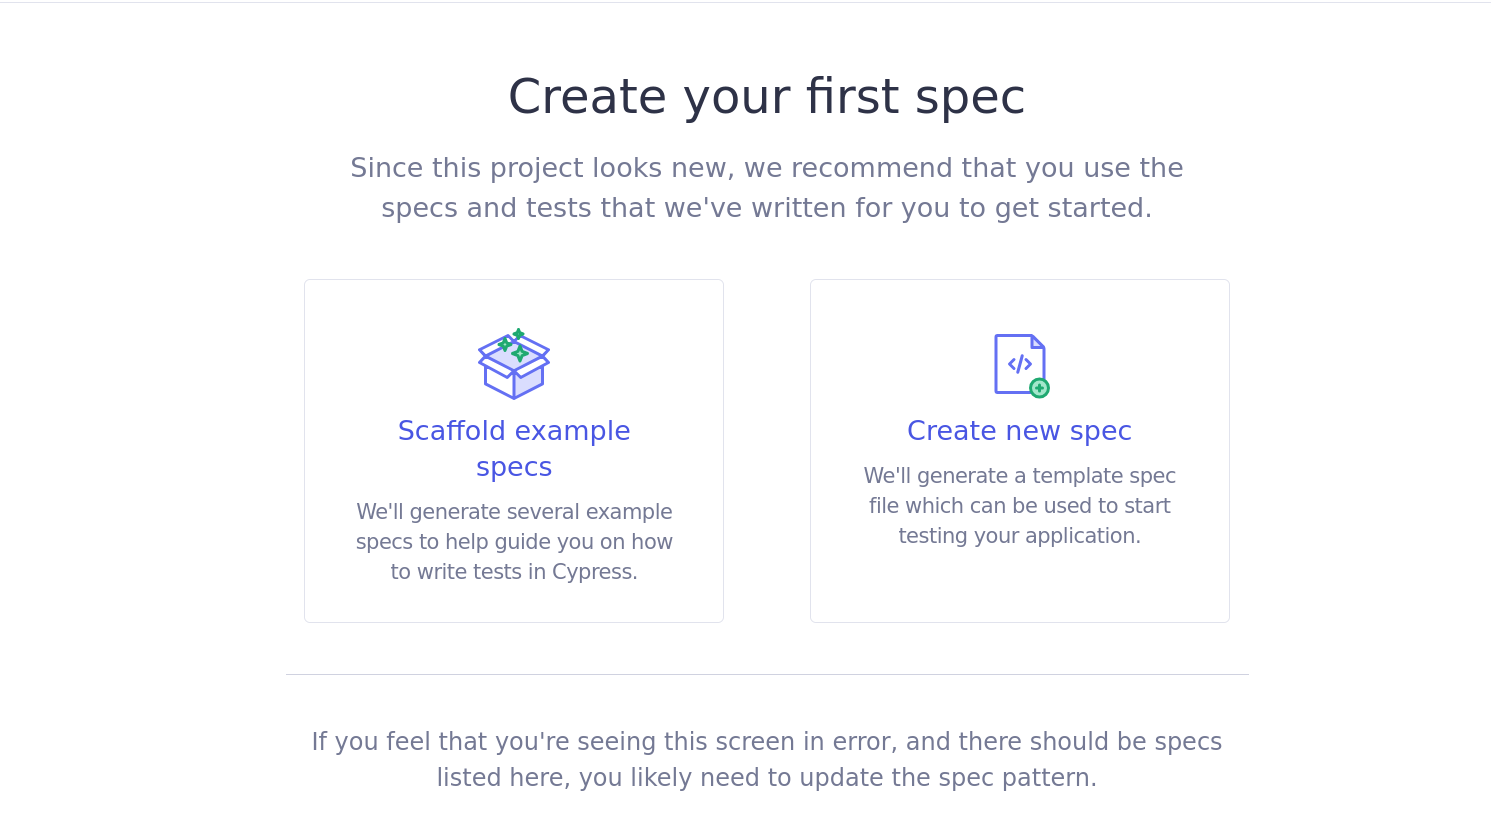
Next, you will get an option to scaffold spec files or create a new spec file from scratch. Select create new spec file.
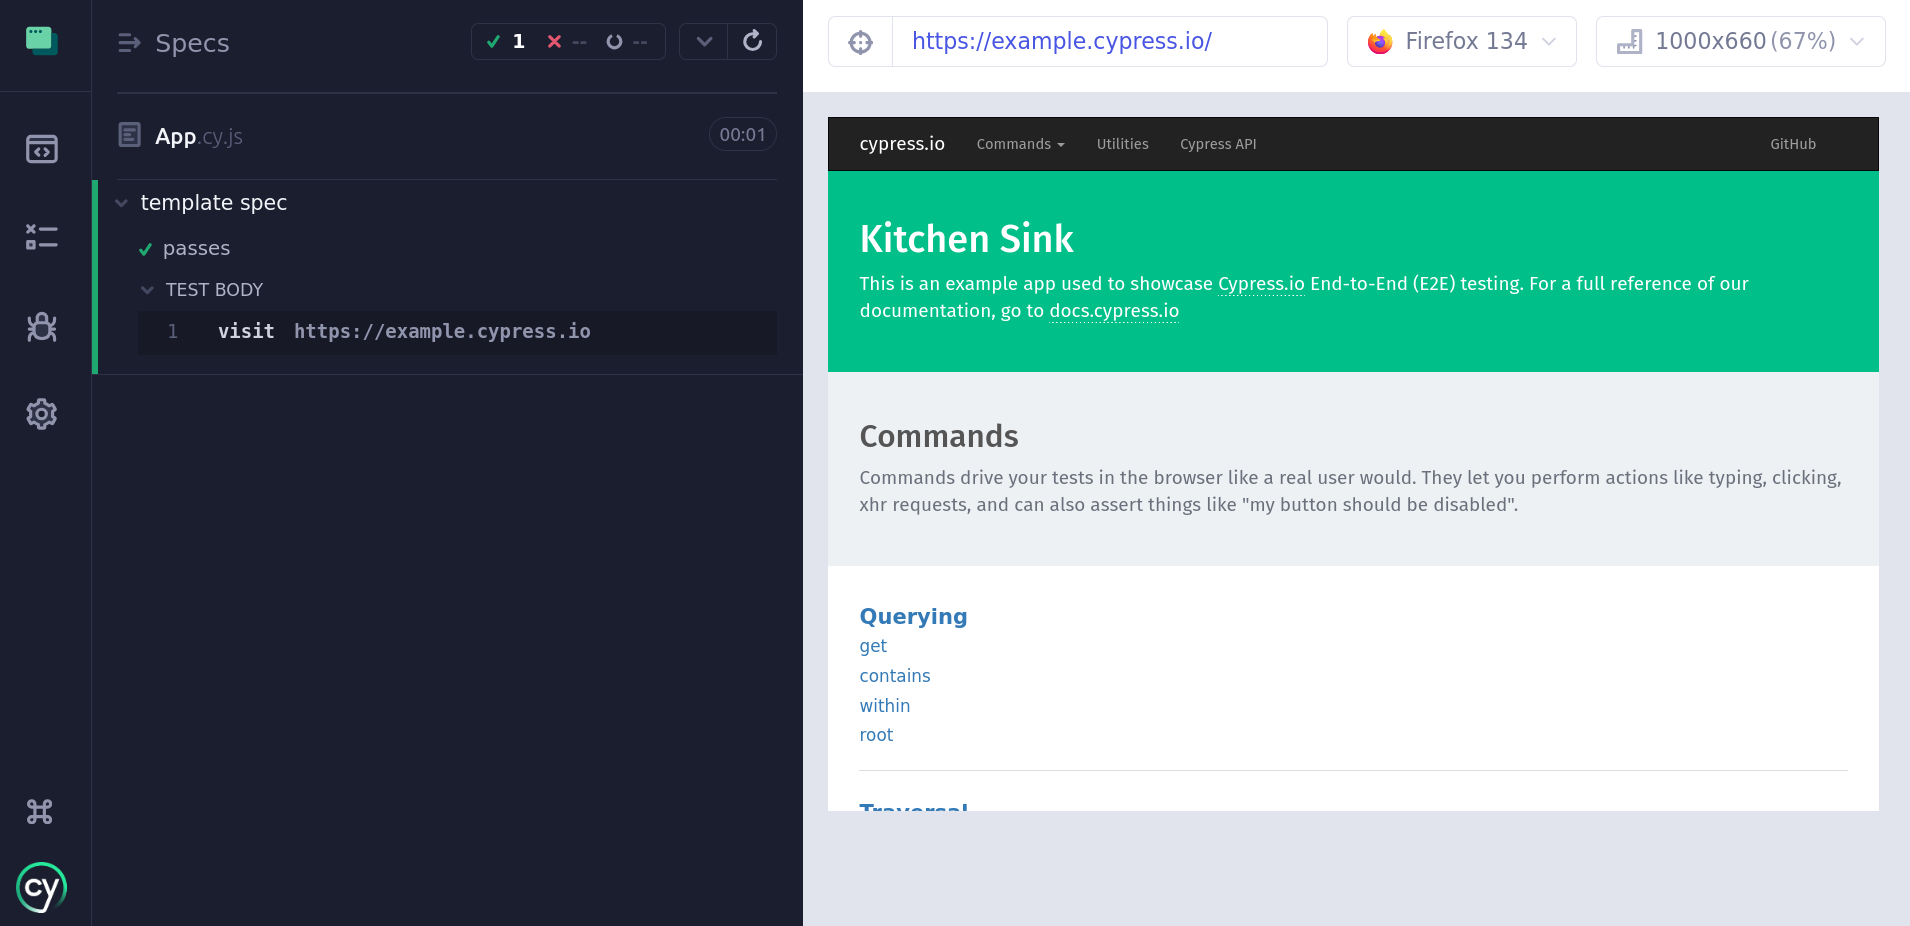
It will try to create a new test. Name your test cypress/e2e/App.cy.ts. Accept the default sample code.
Click on the newly created test to run it. The test will pass as we haven't implemented anything yet.

You can add other tests directly from the browser in this manner. If you go back to your code and go into the Cypress folder you will see an e2e/App.cy.ts was created as well. You can add your tests here, which is what we will be doing going forward.
Update the script section in the package.json file. Add a new test script to run the tests.
"scripts": {
  "test": "cypress open"
},
The final step before we begin testing is to ensure you have your React server running in one terminal and Cypress in another. Otherwise Cypress will not be able to detect your application.
Testing Rendering
Let's add a test that verifies that the grid renders correctly. Update the App.cy.ts file with the following code:
describe('AG Grid Rendering', () => {
  beforeEach(() => {
    cy.visit('http://localhost:5173/');
  });

  it('should render the AG Grid component', () => {
    cy.get('.ag-root-wrapper').should('be.visible');

    // Verify column headers
    cy.get('.ag-header-cell-text').eq(0).should('have.text', 'Make');
    cy.get('.ag-header-cell-text').eq(1).should('have.text', 'Model');

    // Wait for grid to load and verify first row data
    cy.get('.ag-cell').should('have.length.greaterThan', 0);
    cy.get('.ag-cell').eq(0).should('have.text', 'Tesla');
  });
});
The test suite first navigates to a local development server at port 5173 before each test using beforeEach.
The main test checks if the grid renders correctly by verifying several elements. It confirms the grid wrapper is visible, validates that the first two column headers are "Make" and "Model" respectively. It also ensures the grid contains data by checking for the presence of cells, and verifies that the first cell contains "Tesla".
Run the test with the following command:
npm run test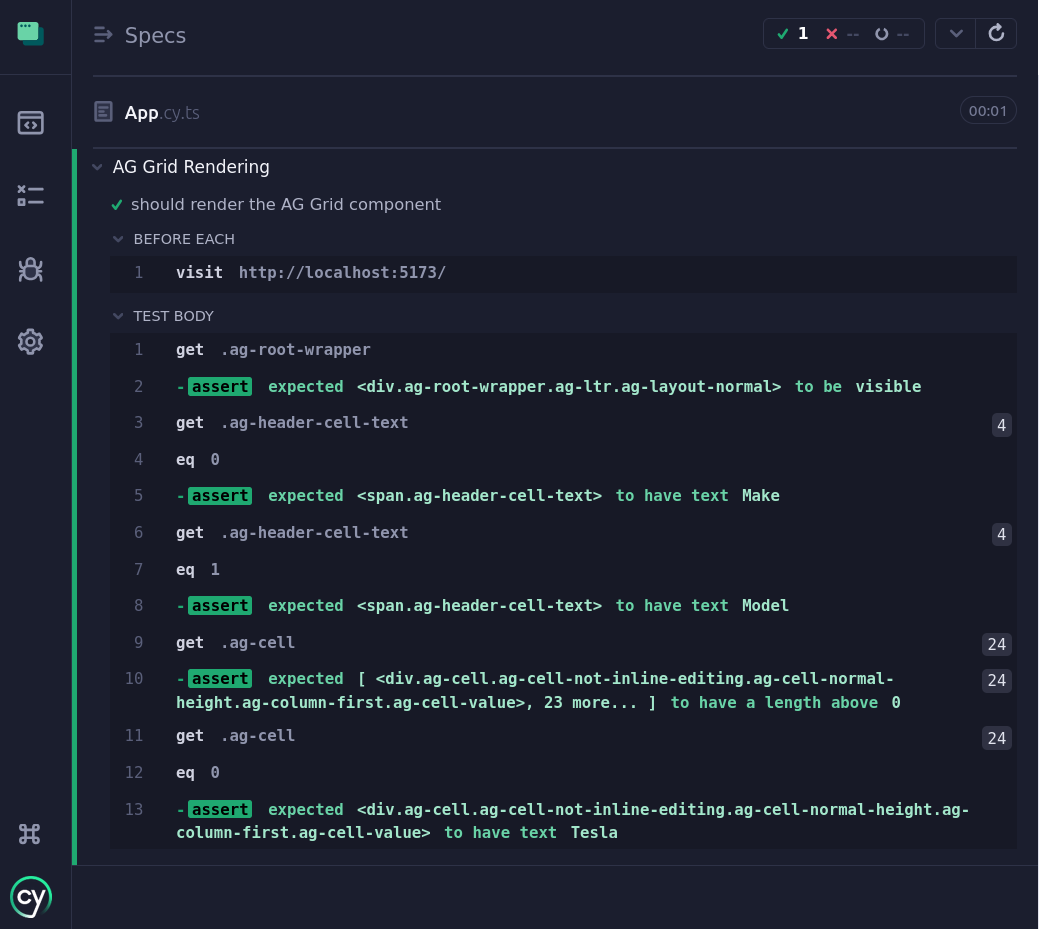
Asynchronous data loading
Most uses of AG Grid will involve fetching data from an API, so let's simulate this by asynchronously loading our rowData with a setTimeout:
const [rowData, setRowData] = useState<ICar[] | null>(null);

useEffect(() => {
  // Simulate an asynchronous data fetch (e.g., from an API)
  setTimeout(() => {
    setRowData([
      { make: "Tesla", model: "Model Y", price: 64950, electric: true },
      { make: "Ford", model: "F-Series", price: 33850, electric: false },
      { make: "Toyota", model: "Corolla", price: 29600, electric: false },
      { make: "Mercedes", model: "EQA", price: 48890, electric: true },
      { make: "Fiat", model: "500", price: 15774, electric: false },
      { make: "Nissan", model: "Juke", price: 20675, electric: false },
    ]);
  }, 500);
}, []);
Next, let's write a test to verify the table is rendered correctly when async data is involved:
it("should display the loading overlay and then show the data", () => {
  // 1. Check that the AG Grid loading overlay is visible
  cy.get(".ag-overlay-loading-center").should("be.visible");

  // 2. Wait for the first cell to contain "Tesla" (data is loaded)
  cy.get(".ag-cell").first().should("have.text", "Tesla");

  // 3. Ensure the loading overlay disappears after data loads
  cy.get(".ag-overlay-loading-center").should("not.exist");
});
This test code verifies the loading behavior of an AG Grid component when asynchronous data is involved. It checks that a loading overlay is visible while data is being fetched, then waits for actual data to appear and checks the data. Finally, it confirms that the loading overlay has disappeared after the data loads.
User interaction testing
Cypress can be used to simulate user interactions accurately. In this section we will thoroughly test our grid's behavior based on simulated user interactions.
Sorting
Let’s create a test to verify the grid’s sorting functionality. Specifically, this test will check that clicking the price column header correctly sorts the data in both ascending and descending order.
Let's add the following code to our App.cy.ts file:
// ... Rest of the code

describe('AG Grid sorting', () => {
  beforeEach(() => {
    cy.visit('http://localhost:5173/');
  });

  it('sorts "Price" column ascending and then descending', () => {
    // 1. Locate the "Price" column header and click
    cy.contains(".ag-header-cell-text", "Price").click();

    // 2. Verify the first row in the grid is now 'Fiat'
    cy.get('.ag-row[row-index="0"] [col-id="make"]')
      .should("have.text", "Fiat");

    // 3. Click again to sort in descending order
    cy.contains(".ag-header-cell-text", "Price").click();

    // 4. Verify the first row in the grid is now 'Tesla'
    cy.get('.ag-row[row-index="0"] [col-id="make"]')
      .should("have.text", "Tesla");
  });

});
In the above code, we use the rowIndex (which reflects the row's current position in the grid's display) to verify the sort order. In this example, we've hardcoded the values we expect to see.
A more robust test may loop through the values of each row, to validate sorting functionality. The following is a test that dynamically validates the sorting functionality by looping through the grid values instead of hardcoding expectations.
sourceRowIndex to compare values before and after sorting as this represents the position of a row in the original rowData array and remains constant regardless of sorting, filtering, grouping, or other UI operations.Edit cell value
In your column definition, make sure you have the make and price columns set as editable.
const [colDefs, _setColDefs] = useState<ColDef<ICar>[]>([
  { field: "make", editable: true, filter: true },
  { field: "model" },
  { field: "price", editable: true },
  { field: "electric" },
]);
Add the following test to your test suite to verify the cell edit behavior of your grid.
describe("AG Grid Editable Cell", () => {
  beforeEach(() => {
    cy.visit("http://localhost:5173/");
  });

  it('should allow editing of cells and update the data', () => {
    // 1. Locate the editable cell for "Price" in the first row
    const priceCellSelector = '.ag-row[row-index="0"] [col-id="price"]';

    // 2. Double-click the cell to activate edit mode
    cy.get(priceCellSelector).dblclick();

    // 3. Wait for the input field to appear
    cy.get(`${priceCellSelector} input`)
      .should("be.visible")
      .as("priceInputField");

    // 4. Enter a new value into the input field and simulate pressing Enter
    const newPrice = "70000";
    cy.get("@priceInputField")
      .clear()
      .type(`${newPrice}{enter}`);

    // 5. Verify the cell displays the updated value
    cy.get(priceCellSelector).should("have.text", newPrice);
  });
});
The above test simulates the following:
- It locates the price cell in the first row (
row-index="0") by itscol-id="price". - It double-clicks on this cell to activate the cell’s edit mode.
- It then waits until the input field (rendered by AG Grid for editing) is visible.
- It clears the existing value, types in a new price, and presses Enter to commit the change.
- It verifies that the cell now displays the updated price value.
Filtering
Next, let's test the filtering functionality. In your column definition turn the make column to be filterable.
const [colDefs, _setColDefs] = useState<ColDef<ICar>[]>([
  { field: "make", editable: true, filter: true },
  // ... Rest of the code
]);
Add the following test to verify filter functionality
describe('AG Grid Make Column Filter', () => {
  beforeEach(() => {
    cy.visit('http://localhost:5173/');
  });

  it('should filter data by "Make" using the column filter menu', () => {
    // 1. Wait for the AG Grid root element to be visible
    cy.get('.ag-root').should('be.visible');

    // 2. Locate and click the filter menu icon for the "Make" column
    cy.get('.ag-header-cell[col-id="make"] .ag-header-icon')
      .should('be.visible')
      .click();

    // 3. Fill in the filter input with "Tesla"
    cy.get('.ag-filter-body input[placeholder="Filter..."]').type('Tesla');

    // 4. Verify only one row is visible
    cy.get('.ag-center-cols-viewport .ag-row').should('have.length', 1);

    // 5. Check that the "Make" cell in the first (and only) row contains "Tesla"
    cy.get('.ag-center-cols-viewport .ag-row')
      .first()
      .find('.ag-cell[col-id="make"]')
      .should('have.text', 'Tesla');
  });
});
The test above clicks the filter icon in the "Make" column header, enters "Tesla" as the filter criteria, and then confirms that the filtering works correctly by checking that only one row remains visible and that this row contains "Tesla" in the Make column.
Accessibility testing
AG Grid provides amongst the best support for accessibility compared to other grids available on the market today. This section demonstrates how to test this by validating things like a11y standards, ARIA labels etc.
Accessibility (a11y) checks
Install the cypress-axe package in your project with the following command
npm install --save-dev cypress-axeNavigate to your cypress/support/e2e.ts file and add the following code to import and initialize cypress-axe:
import 'cypress-axe';

Cypress.Commands.add('injectAxe', () => {
  cy.window({ log: false }).then((win) => {
    // Inject axe-core runtime into the browser
    // This makes the `axe` global available
    const script = win.document.createElement('script');
    script.src = 'https://cdnjs.cloudflare.com/ajax/libs/axe-core/4.6.3/axe.min.js';
    win.document.head.appendChild(script);
  });
});

Cypress.Commands.add('checkA11y', (context, options = {}, violationCallback) => {
  // By default, run on the entire document if 'context' is not provided
  cy.window({ log: false }).then((win) => {
    return new Promise((resolve) => {
      win.axe.run(context || win.document, options, (error, results) => {
        if (error) throw error;
        if (results.violations.length) {
          if (violationCallback) {
            violationCallback(results.violations);
          } else {
            cy.log('Accessibility violations found:', results.violations);
          }
        }
        resolve(results);
      });
    });
  });
});
Next add the following test to your test suite.
describe('Accessibility Tests', () => {
  it('should have no a11y violations on load', () => {
    // 1) Visit your app
    cy.visit('http://localhost:5173');

    // 2) Inject axe into the page
    cy.injectAxe();

    // 3) Optionally wait for content to finish loading
    cy.get('.ag-root').should('be.visible');
    cy.get('.ag-overlay-loading-center').should('not.exist');

    // 4) Run accessibility checks
    cy.checkA11y();
  });
});
This example Cypress test visits your AG Grid page, waits for the grid to load, and runs the axe-core audit.
This automated test ensures your AG Grid implementation follows accessibility standards by automatically catching common issues like missing ARIA labels, contrast problems, or improper HTML structure.
Conclusion
In this tutorial, we covered essential testing scenarios for testing AG Grid components using Cypress. You can build upon these examples to create more specialized tests for their specific use cases, whether that involves complex data manipulations, custom cell renderers, or advanced filtering scenarios.
If you’re an enterprise user and need further assistance with testing strategies, please contact us through Zendesk.