
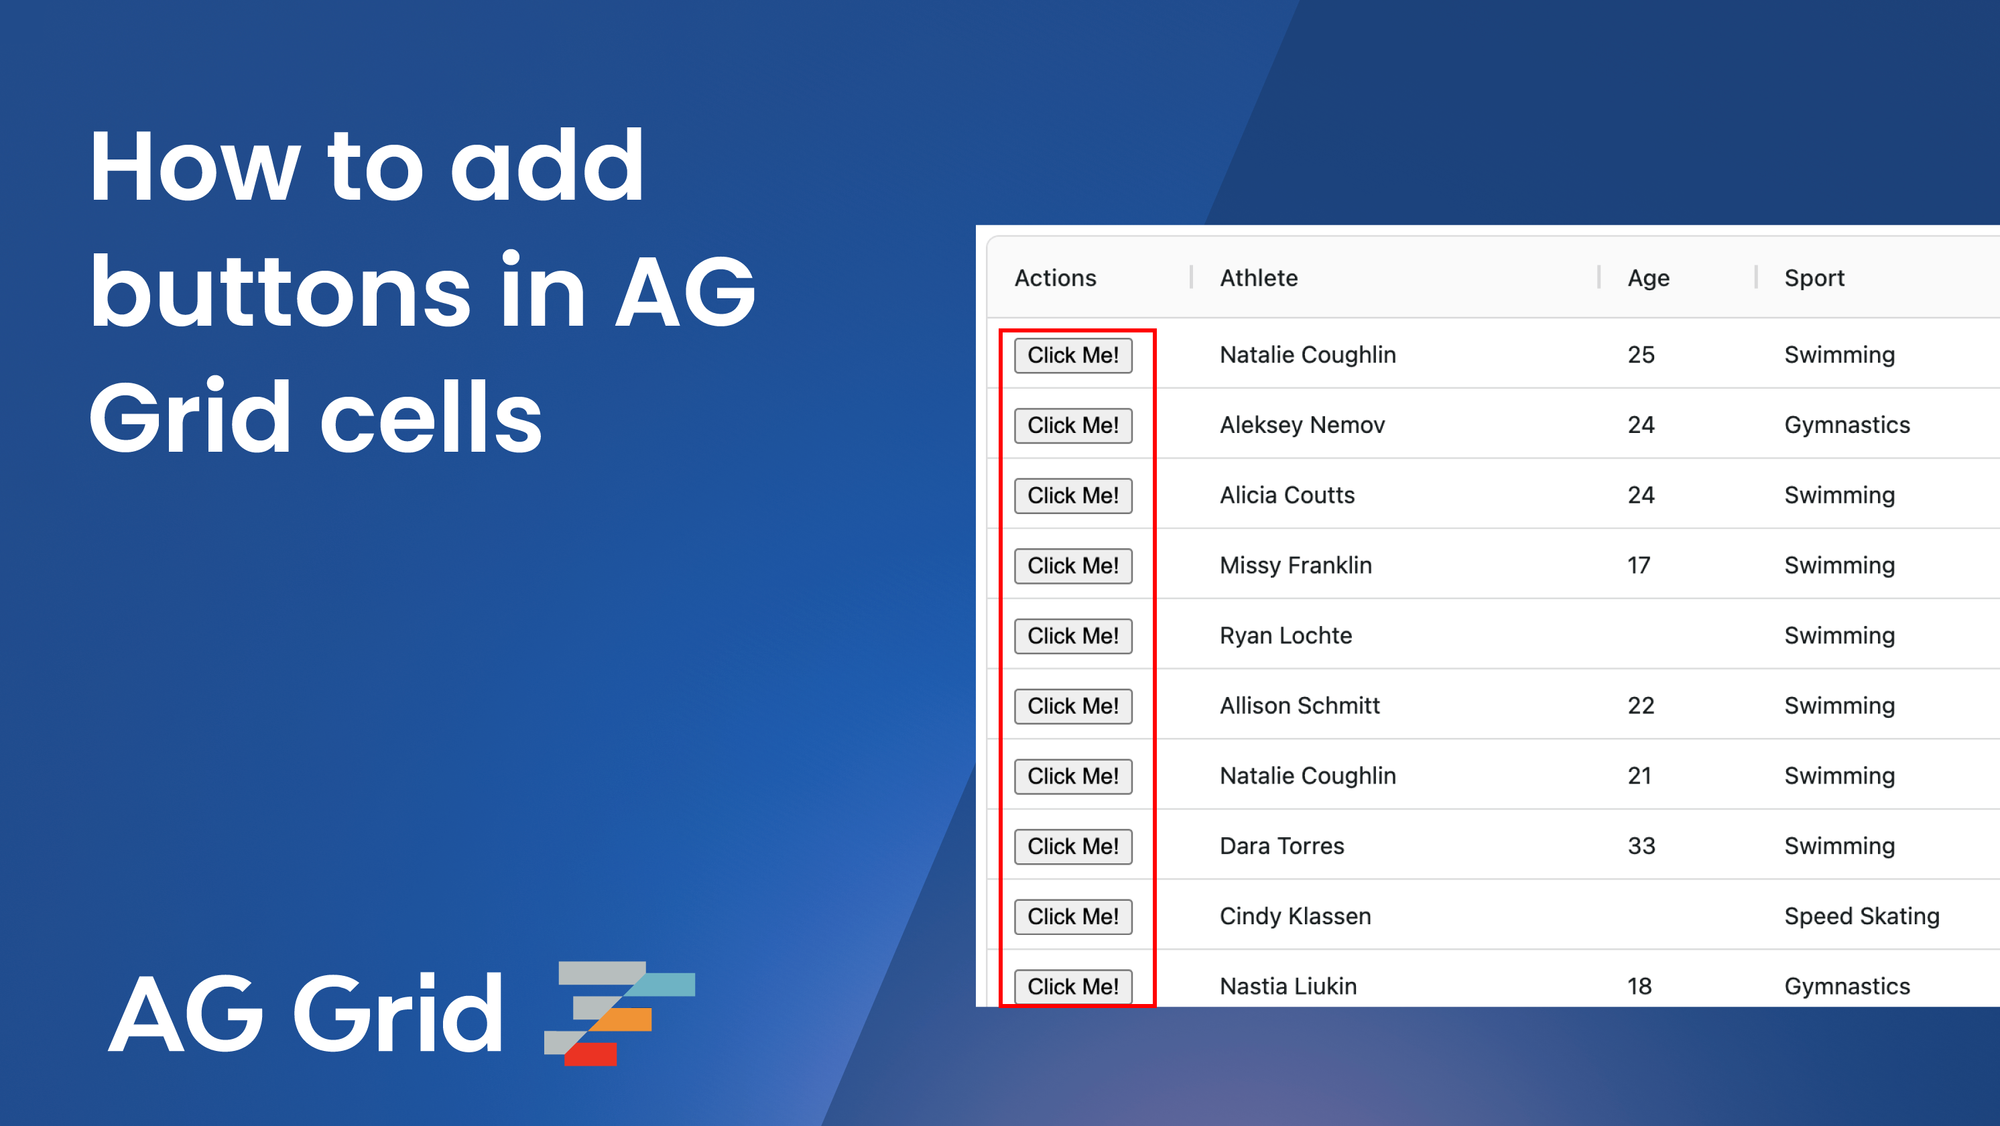
Easily add buttons to AG Grid cells using a Cell Renderer. Cell Renderers allow you to create your own custom components and render them directly into an AG Grid cell.
This blog will show you how to add a button to a cell in your React Data Table. We've also included full code examples showing how to add a button to JavaScript, Vue, and Angular Data Tables.
To skip straight to the AG Grid documentation on Cell Renderers select your framework:
How to add buttons to cells in your React Data Table.
This guide assumes you're adding a button to an existing React Data Table. To set up a new grid, follow our Getting Started documentation.
Define your button component
In a new file, define a simple .jsx component that will render a button in the cell, and export it as the default:
import React from 'react';

export default () => {
  return (
    <button>Click Me!</button>
  );
};
Provide your component to AG Grid
To display the button in a cell, you need to provide your component to a specific column via the columnDefinitions property:
- Add a new column definition to your existing array of AG Grid columns
- Define the
fieldandheaderNameof your new column. - Import your button component from your new file and provide it within your column definition in the
cellRendererfield.
const columnDefs = useMemo(() => {
  return [
    {
      field: 'button',
      headerName: 'Button',
      cellRenderer: CustomButtonComponent,
    },
    ...
  ];
});
Add an event listener to your button
Now that you've defined and added a button to your React Data Table, you can make it more functional by adding an event listener. Add the following snippet to the .jsx file containing your button:
<button onClick={() => window.alert('Button Clicked!')}>Click Me!</button>You should now have a button rendered within your AG Grid data table which responds to an onClick event. See this in the live demo below:
If you're using a different framework, you can view or download the code examples for React, Angular, Vue, or JavaScript Data Tables here:
What's next?
We hope this blog (inspired by a popular Stack Overflow question) helped you learn how to add buttons to a data table. Check out our other blog posts and documentation to explore more AG Grid features.
If you’d like to try AG Grid, check out our getting started guides for React, JavaScript, Angular, or Vue.
Happy coding!